Disclosure: As an Amazon Associate, I earn from qualifying purchases. This technical review contains affiliate links which support our research at no cost to you.
Many home lifters look at a compact vertical cable station and wonder exactly how to mount pulley tower to wall surfaces without causing structural damage or risking a complete anchor failure. Because these systems convert manual pulling speed into high levels of kinetic tension, proper installation is the difference between a highly effective training tool and a severe physical hazard.
In this technical installation guide, we show you exactly how to mount pulley tower to wall studs, brick, or concrete walls. We analyze stud-mapping physics, pilot-hole diameter calculations, and ledger board workarounds to ensure your home gym setup remains completely rock solid.

To mount a gym pulley tower securely, you must anchor its upper and lower brackets directly into wood wall studs or concrete using 3-inch lag bolts (5/16″ or 3/8″ diameter). Always drill pilot holes to prevent wood splitting, verify your stud’s exact center points with a multi-crystal stud finder, and use a horizontal plywood header board if your wall stud spacing does not align with your machine’s brackets.
Access our main wall mounted cable machine buying guide to compare top models, specs, and price ranges.
Compare the mechanical differences, pulley ratios, and guide-rod friction levels of plate-loaded vs. selectorized systems.
Explore door anchors and suction mounts using our renter-friendly cable machine alternatives.
Review the best ergonomic lat bars, d-handles, and ropes to maximize structural back isolation.
1.0 Stud Mapping: Wood Studs vs. The Drywall Illusion
Drywall alone has near-zero structural load capacity for heavy gym equipment. Anchoring a 100-pound steel pulley tower to standard drywall—even with toggle bolts—will lead to wall failure when you pull a heavy weight carriage.
To safely secure the tower, you must locate the exact center of your wall’s internal wood studs. Wood studs are typically 1.5 inches wide, leaving little room for error if your lag bolt slips to the left or right of center.
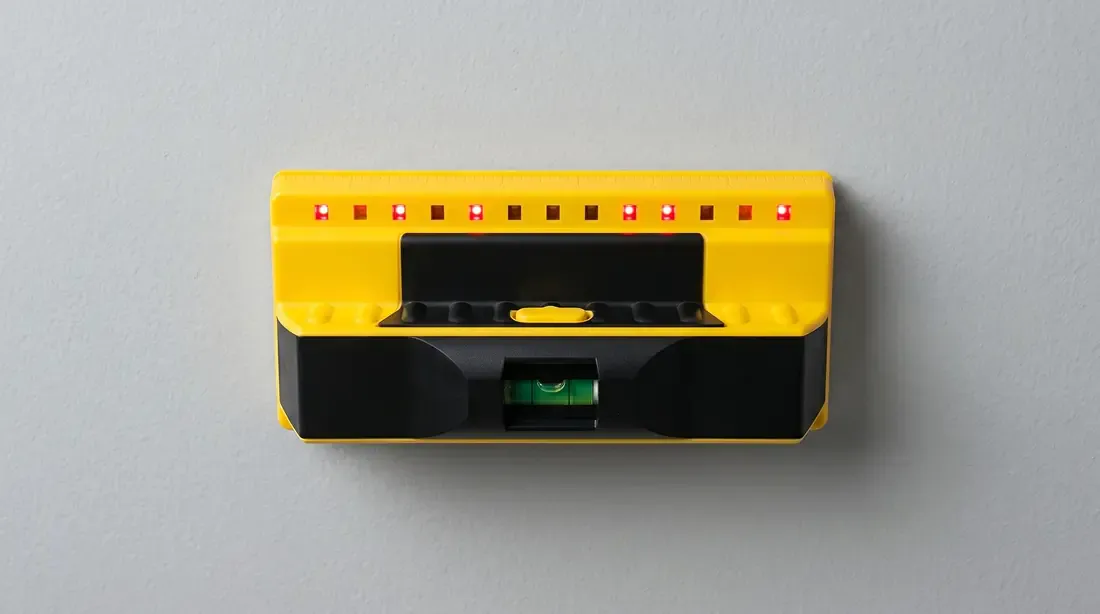
Mapping the exact outer edges and center line of a 2×4 framing stud with a multi-sensor scanner.
2.0 Fastener Physics: Selecting the Correct Lag Bolts
Most pulley towers ship with basic wall hardware, but some models omit mounting fasteners entirely. You should purchase heavy-duty, zinc-plated hex lag bolts rather than generic drywall screws or thin wood screws.
A 5/16-inch or 3/8-inch diameter lag bolt extending at least 3 inches in length is standard. According to structural guidelines from the American Wood Council (AWC), lag screws must penetrate the center of a Douglas Fir or Southern Yellow Pine stud by at least 2.5 inches to achieve their rated shear and pull-out capacities.
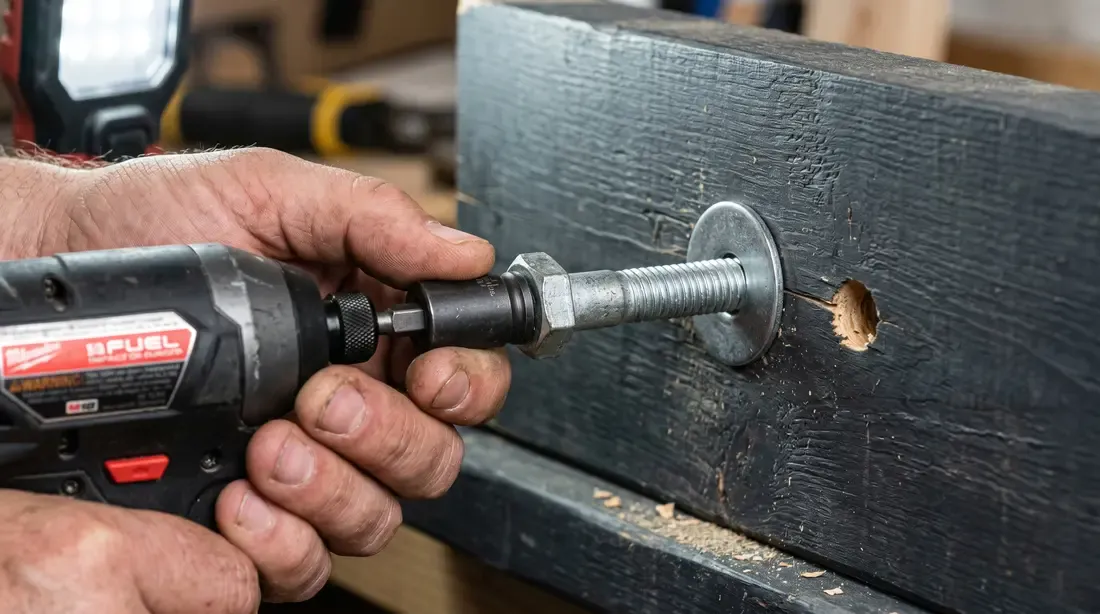
Hex lag bolt threaded with a wide flat washer to distribute the pull-out force over the mounting bracket.
3.0 Pilot Hole Precision: Preventing Stud Splitting
Never drive a thick hex lag bolt directly into wood studs without pre-drilling. Driving a 5/16″ or 3/8″ bolt dry will split the structural wood grain inside your wall, drastically reducing its load holding capacity.
Always drill a pilot hole first. Use a drill bit that matches the inner shank diameter of your lag bolt (usually 7/32-inch for a 5/16″ bolt, or 1/4-inch for a 3/8″ bolt). This allows the outer threads of the bolt to cut deep grooves into the wood fibers while preventing the stud from splitting.
Verify your depth. Wrap a piece of painter’s tape around your drill bit exactly 2.5 inches from the tip. Stop drilling when the tape line meets the drywall face. This ensures your pilot hole is deep enough to prevent the bolt from snapping off inside the wall while avoiding damage to behind-wall electrical wiring or plumbing.
4.0 Header Boards: Solving Non-Standard Stud Spacing
Standard home wall studs are spaced 16 inches apart (measured on-center). Some home gym cable systems feature pre-drilled brackets that require mounting at specific widths that do not match your wall’s stud layout.
To resolve this issue, you must install a wooden ledger or header board. Anchor a clean 2×6 or 2×4 piece of kiln-dried lumber horizontally across two wood studs using four lag bolts. Once this header board is secured, you can bolt your pulley tower’s brackets directly into the wood board at any horizontal position.
5.0 Concrete and Masonry Mounting Protocols
If you are installing your cable machine in a basement or garage with solid concrete, brick, or masonry walls, you will need a different set of tools and fasteners.
You cannot use standard wood screws or wood lag bolts. Instead, use a hammer drill equipped with a 3/8-inch masonry drill bit to drill holes. Insert heavy-duty metal concrete sleeve anchors or expansion anchors into the holes, then secure the tower brackets tightly using a socket wrench.
Mounting Steps & Tools Comparison
The following table outlines the step-by-step mounting processes for both wood and masonry surfaces. Swipe horizontally on mobile devices to review all steps:
| Mounting Phase | Wood Stud Mounting Method | Solid Concrete / Masonry Method |
|---|---|---|
| Stud Finding | Requires a multi-crystal stud finder to mark centers | Not required; locate flat concrete space away from joints |
| Drill Type & Bit | Standard cordless drill with a 7/32″ wood drill bit | Hammer drill with a 3/8″ carbide masonry bit |
| Fastener Type | 5/16″ x 3″ Zinc-plated hex lag screws | 3/8″ x 3″ Steel concrete sleeve or expansion anchors |
| Pilot Hole Depth | 2.5 inches deep to match stud thickness | 3.0 inches deep; vacuum out concrete dust before insert |
| Core Utility Benefit | Provides clean, hidden structural setup inside drywall | Incredibly high load capacity; direct masonry contact |
Recommended Tools for Safe Installation
To ensure a highly precise and secure installation, we recommend utilizing professional, trade-grade tools rather than budget hardware kits.
Franklin Sensors ProSensor 710+ Stud Finder
The ProSensor 710+ uses a patented multi-crystal sensor array to scan multiple areas of the wall simultaneously. Unlike simple stud finders that only locate edge lines, this tool instantly maps the exact center of wood studs through thick drywall, eliminating installation guesswork.
- Multi-Sensor Technology: Analyzes several sensor points to reduce mapping errors.
- Instant LED Display: Clearly displays stud width and center points instantly.
- Deep Scanning Depth: Scans through double drywall sheets up to 1.6 inches thick.
- Consistent wood stud center mapping.
- No calibration required; works instantly against the wall.
- Highly visual LED bar is easy to read.
- Slightly wider profile than basic single-line scanners.
- Requires AA batteries to operate.
Heavy-Duty TV & Gym Mounting Lag Bolt Kit
This structural hardware kit includes hardened hex lag screws, matching flat washers, masonry drill bits, and concrete wall plugs, providing superior load-holding capacity compared to basic carbon steel fasteners.
- Hardened Zinc-Plated Carbon Steel: High tensile strength resists shear force snap.
- Concrete Anchors Included: Features matching concrete wall plugs for masonry setups.
- Complete Kit: Comes with flat washers and matching drill bits for immediate installation.
- Eliminates the risk of bolt head shear during heavy lifting.
- Wide washer prevents metal brackets from digging into wood fibers.
- High value; includes both wood and concrete mounting elements.
- Requires a socket drive or impact socket to install.
- Concrete anchors are not compatible with wood studs.
6.0 Shear vs. Tension: Understanding Dynamic Force
When you use a pulley tower, your wall experiences two distinct physical forces. Shear force is the downward pull created by gravity acting on the weight stack, while tension force is the horizontal pull trying to yank the brackets out of the wall during rows or bicep curls.
Because these dynamic forces pull from different angles during training, any small wiggle in your brackets will eventually wear down the wood fibers inside your wall. Ensuring your fasteners are driven perfectly perpendicular to your studs is critical to prevent bracket loosening over time.
7.0 Pre-Workout Anchor Inspection Routine
Safety shouldn’t stop after the initial installation. Once your pulley tower is mounted, make it a habit to check the mounting points regularly.
Before starting your workout, place your hands on the tower frame and apply light horizontal pressure. Look closely at the upper wall brackets for any movement, gap widening, or drywall dust. If you detect any play, tighten the lag bolts immediately before loading the weight carriage.
Frequently Asked Questions
No, standard metal studs are not thick enough to support the pull-out forces generated by a gym cable machine. If your home has metal studs, you must span multiple studs with a plywood header board first to distribute the pull-out load safely.
Your lag bolts must penetrate at least 2 to 2.5 inches into the solid wood stud itself. Since standard home drywall is 1/2-inch thick, using a 3-inch long bolt ensures that you bypass the drywall layer and anchor deeply into solid wood.
No, plastic wall anchors or plugs are designed only for static loads like small picture frames or mirrors. The dynamic pulling forces generated by exercise cables will quickly pull plastic anchors out of drywall, causing the machine to fall.