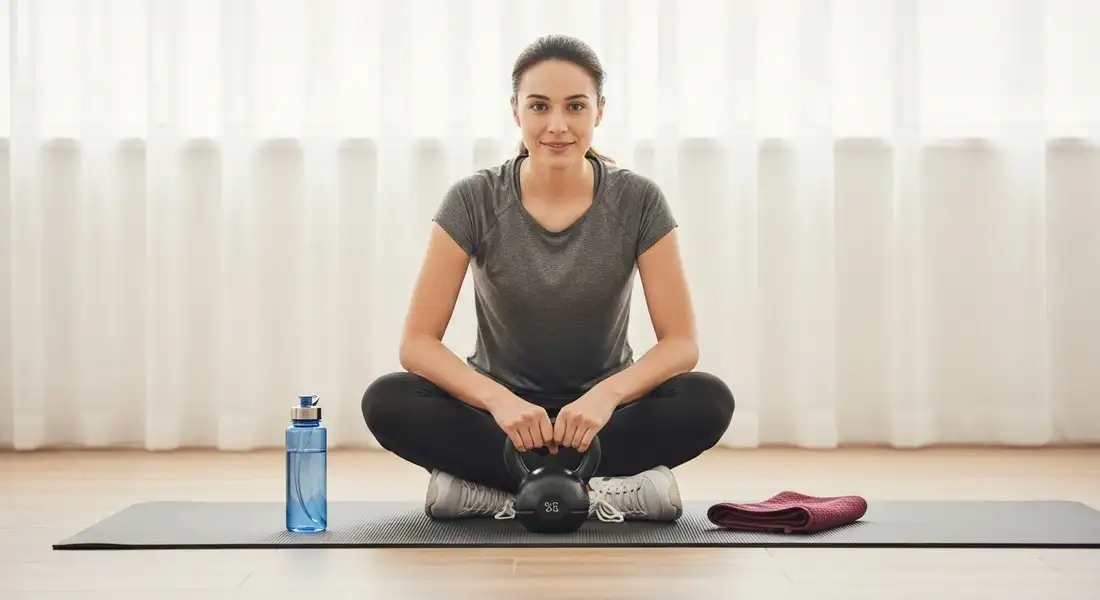
The Most Important Kettlebell Lesson – How to Stay Safe
Congratulations! You’ve learned the foundational movements and are ready to start swinging, squatting, and pressing your way to a stronger body with our guide to 5 Fundamental Kettlebell Exercises.
But before you jump into your first workout, we need to cover the most critical topic of all: safety.
Working out at home means you are your own spotter, coach, and safety supervisor.
The universal “do’s and don’ts” of proper technique, like those outlined by medical experts at the Mayo Clinic for safe weight training, are the foundation of any successful fitness program.
By making kettlebell safety at home a non-negotiable habit, you ensure that every workout is effective and that you can continue training injury-free for years to come.
These rules aren’t meant to scare you; they’re here to empower you.
The 6 Golden Rules of Kettlebell Safety
1. Create Your “Safe Swing Zone”

The dynamic nature of kettlebell training, especially the swing, means the weight moves away from your body.
You absolutely must have a clear, dedicated space to train in.
How to Measure Your Zone
- Stand in the spot where you plan to work out.
- Hold your arms straight out to your sides. This is your minimum side-to-side clearance.
- Now, hold your arms straight out in front of you. Take one large step forward. This is your “swing zone.”
Your Rule: Aim for a 5-foot radius of clear space around you in all directions. Ensure there are no coffee tables, lamps, pets, or children nearby.
Check Your Flooring
Train on a flat, stable, non-slip surface. Hardwood, firm rubber flooring, or a low-pile carpet is ideal.
Avoid plush, shifty carpets or slippery tile, as they can compromise your footing.
Investing in proper flooring can transform your home gym. Explore options in our guide to The Best Home Gym Flooring.
2. Master Form Before Speed or Weight
Enthusiasm is great, but it can lead beginners to rush into adding more weight or trying to complete reps as fast as possible.
This is the fastest way to get injured.
Your Rule: Your first goal is to make the correct form feel automatic. Practice the movements slowly and deliberately. Perform every single rep, from the first to the last, as if it’s the most important rep of your life. Quality over quantity, always.
3. Protect Your Spine at All Costs
Your back is your lifeline. The most common kettlebell injuries come from improper spinal alignment.
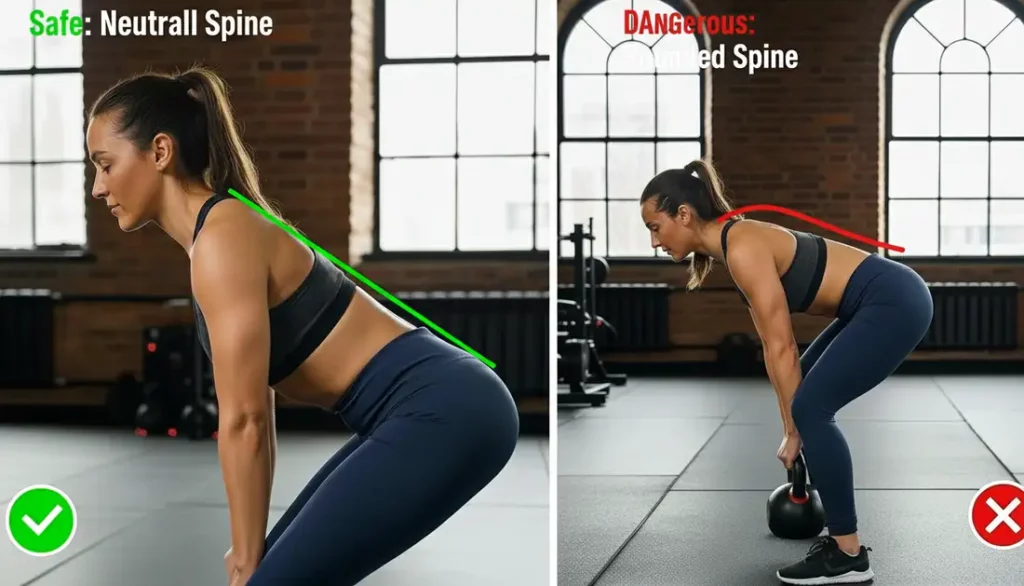
Maintain a Neutral Spine
During hinges, deadlifts, and swings, your back must remain straight and rigid—no rounding or arching. Imagine a wooden plank running from your head to your hips.
Brace Your Core
Before you lift, brace your abdominal muscles as if you’re about to take a punch to the stomach. This creates a “muscular corset” that stabilizes your entire torso and protects your lower back.
A weak core is often the culprit behind back pain. Learn how Tight Hip Flexors and Lower Back Pain are connected.
4. Choose the Right Footwear (or None at All)
What you wear on your feet matters.
The power for a kettlebell swing is transferred from the ground up through your body.
Why Cushioned Shoes Are a Bad Idea
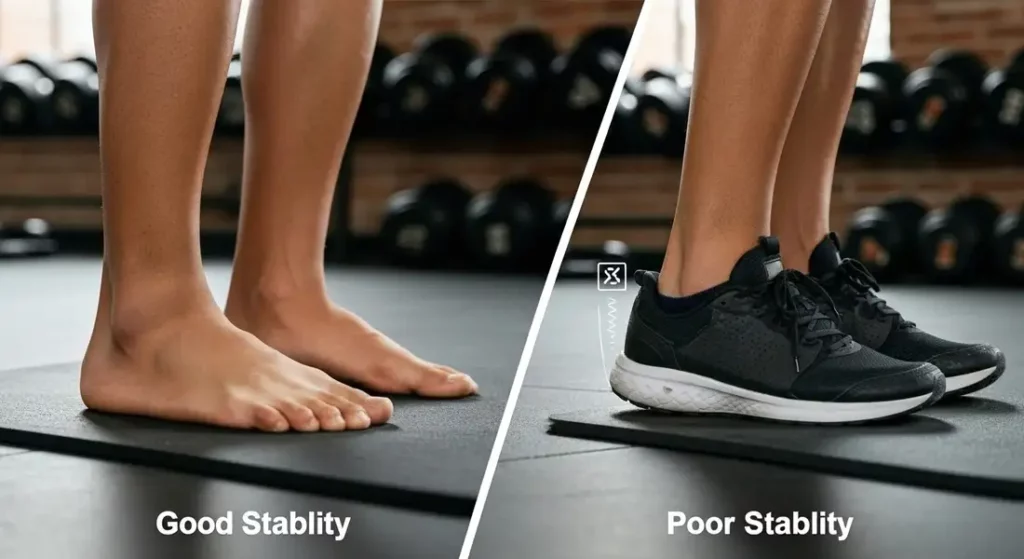
Soft, cushioned running shoes are unstable. They’re like trying to lift weights while standing on a mattress.
Your Best Options
- Barefoot: Training barefoot provides the most stability and allows you to feel your connection to the floor. This is the preferred method for many kettlebell purists.
- Flat-Soled Shoes: If you prefer shoes, choose ones with a flat, hard, minimal sole. Think Converse All-Stars, Vans, or minimalist training shoes.
5. Don’t Forget the Warm-Up and Cool-Down
Jumping into a workout with cold muscles is asking for a strain or a pull.
A proper warm-up is non-negotiable. Revisit the principles in The Art of the Warm-Up for Cardio—the same rules apply here.
Your Rule: Spend 5-10 minutes before every workout doing light cardio (jumping jacks, jogging in place) and dynamic stretches (arm circles, leg swings). After your workout, spend 5 minutes doing gentle stretching for the areas you worked.
6. Listen to Your Body
It’s crucial to understand the difference between the discomfort of hard work and the signal of an injury.
- Good Pain: This is the burning sensation of muscle fatigue. It’s a sign that your muscles are working hard and getting stronger.
- Bad Pain: This is a sharp, stabbing, or sudden pain, especially in a joint (like your lower back, shoulder, or knee). Stop immediately if you feel this type of pain.
Pre-Workout Safety Checklist
| Check Item | Is It Done? | Why It’s Important |
| Clear Your Space | ☐ | Prevents accidents and damage to property or people. |
| Remove Distractions | ☐ | Ensures your full focus is on your form. |
| Check Your Footwear | ☐ | Provides a stable base for power generation. |
| Perform a Warm-Up | ☐ | Prepares your muscles and joints for the workout. |
| Review Your Form | ☐ | Reminds you to prioritize quality over quantity. |
Frequently Asked Questions (FAQ)
Q: Is it okay to wear gloves while using a kettlebell?
A: It’s generally not recommended. Gloves can make the handle thicker and more difficult to grip properly. They often lead to a weaker grip and can bunch up, causing more friction and blisters than they prevent. Use chalk if your hands get sweaty.
Q: My lower back is a little sore after my first swing workout. Is that normal?
A: A little muscle soreness in your glutes and hamstrings is normal. However, if you feel soreness or pain concentrated in your lower back, it’s a major red flag that you are likely lifting with your back instead of hinging with your hips. Stop, rest, and re-watch videos on proper deadlift and swing form before your next session.
Q: What do I do if I lose my grip on the kettlebell?
A: Never try to catch a falling kettlebell. Let it go and jump back and away from it. This is another reason why a clear workout space is so critical.
You’re Ready to Train Smart
You are now equipped with the knowledge to not only train effectively but to train smart. By integrating these safety rules into every single workout, you are investing in your long-term health and fitness.
Now that you’re an expert on the basics, let’s explore one of the most common questions beginners have when setting up their home gym.
Next Step: Complete your beginner knowledge with our final comparison guide: Kettlebells vs. Dumbbells: A Beginner’s Perspective.