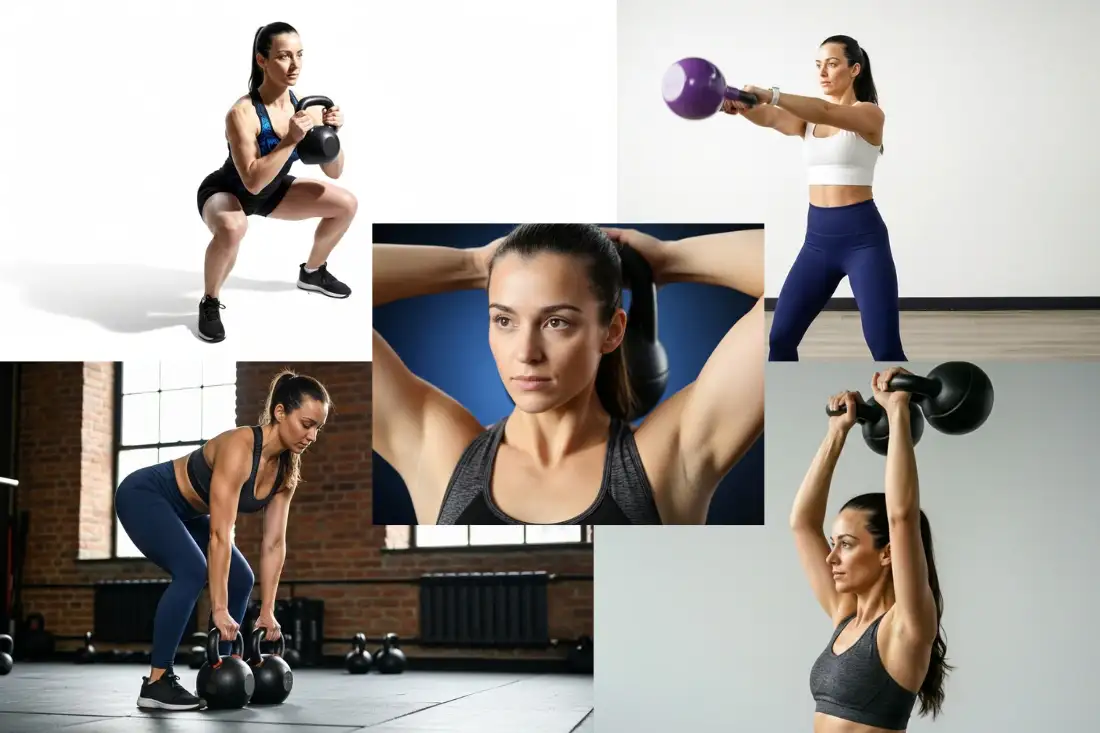
Your First Workout Starts Now
You’ve done the hard work: you understand the benefits, you’ve chosen the right type of kettlebell, and you’ve selected the perfect starting weight.
Now, it’s time for the fun part: learning how to use it.
You don’t need dozens of complex movements to get a fantastic workout.
In fact, the secret to kettlebell mastery is building a rock-solid foundation with just a handful of key exercises.
These five movements are the building blocks of nearly every kettlebell workout you will ever do.
Focus on mastering the form of these beginner kettlebell exercises before you worry about speed or reps.
Quality is everything.
Let’s build your strength from the ground up.
The Foundation – Understanding the Hip Hinge
Before we get to the exercises, you need to understand the hip hinge.
This is NOT a squat.
It’s the movement of bending forward from your hips while keeping your back perfectly straight.
Think of the motion you’d use to close a car door with your hands full.
This is the engine that powers the most effective kettlebell movements.
Exercise 1 – The Kettlebell Deadlift

Why You Must Master It First
This is the single best exercise to safely learn and practice the hip hinge.
It builds foundational strength in your glutes, hamstrings, and back, preparing your body for the kettlebell swing and protecting your spine from injury.
How to Do It – Step-by-Step
- Setup: Place the kettlebell on the floor between your feet. Stand with your feet about shoulder-width apart.
- The Hinge: Push your hips back as if trying to touch a wall behind you. Keep your back completely straight and your chest up. Allow your knees to bend slightly.
- The Grip: Grip the kettlebell handle firmly with both hands. Your shoulders should be pulled back and down.
- The Lift: Drive through your feet, squeeze your glutes, and stand up tall. The kettlebell should rise in a straight line. Do not pull with your lower back.
- The Return: Reverse the motion by pushing your hips back again, lowering the kettlebell back to the floor with full control.
Common Mistakes
- Rounding the Back: This is the cardinal sin. Keep your spine neutral at all times.
- Squatting the Weight: Your hips should move backward and forward, not up and down like in a squat.
Exercise 2 – The Two-Handed Kettlebell Swing
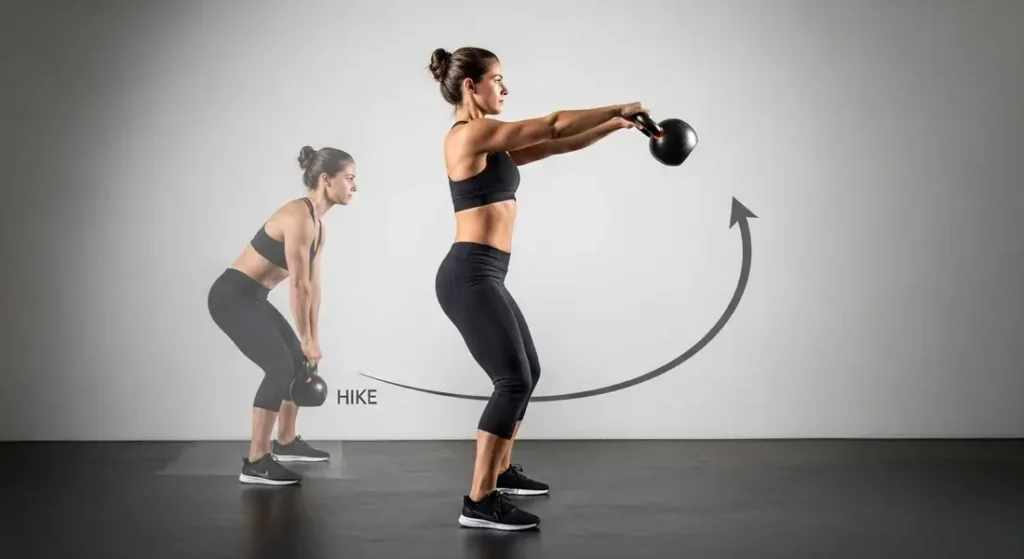
Why It’s the King of Kettlebell Exercises
This is the ultimate fat-burning, power-building, full-body exercise.
It combines strength and cardio, skyrockets your metabolism, and builds explosive power in your hips and glutes.
Because it’s a fast and powerful movement, perfect form is non-negotiable.
Because proper form is so crucial for both safety and results, it’s helpful to see an expert-led breakdown from the American Council on Exercise (ACE), which details the biomechanics of every step.
How to Do It: Step-by-Step
- Setup: Start with the kettlebell about a foot in front of you. Hinge at your hips (just like the deadlift) and grip the handle with both hands.
How to Do It: Step-by-Step
- Setup: Start with the kettlebell about a foot in front of you. Hinge at your hips (just like the deadlift) and grip the handle with both hands.
- The “Hike”: Tilt the kettlebell handle towards you and “hike” it back between your legs like a football center.
- The Hip Snap: As the bell swings forward, snap your hips forward explosively and squeeze your glutes hard. This power from your hips is what propels the bell upward.
- The “Float”: The kettlebell should float up to chest height on its own. Your arms are just hooks; they are not lifting the weight.
- The Return: Let gravity bring the bell back down. Guide it back between your legs as you hinge at the hips again, immediately ready for the next explosive rep.
Common Mistakes
- Squatting the Swing: The movement comes from a hip hinge, not a deep knee bend.
- Using Your Arms: You are not doing a front raise. Your shoulders should be relaxed. The power comes 100% from your hips.
Exercise 3 – The Goblet Squat
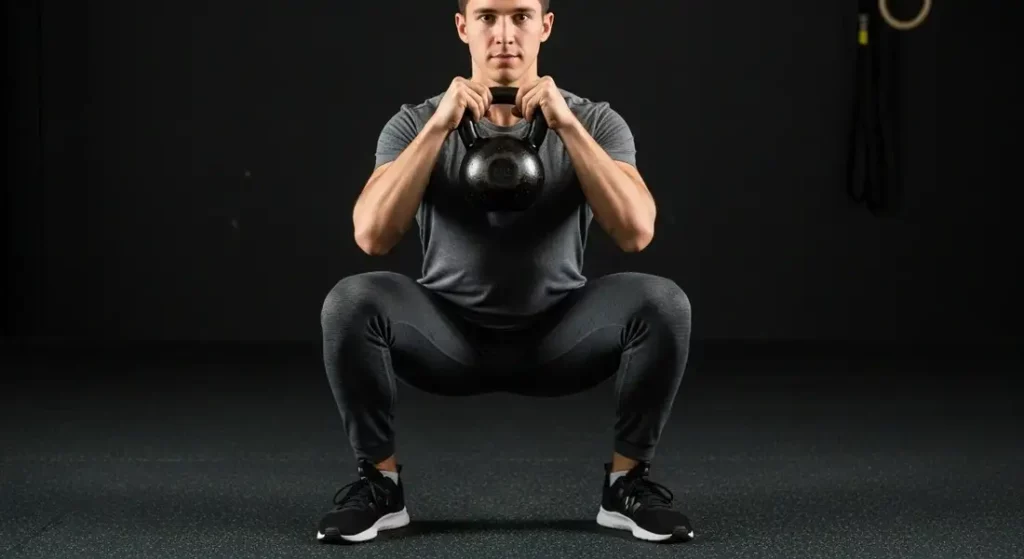
Why It Teaches the Perfect Squat
Holding the weight in front of your body acts as a counterbalance, making it easier to keep your chest up and sink deep into a squat with perfect form.
It’s an incredible lower body and core strengthener.
How to Do It: Step-by-Step
- Setup: Hold the kettlebell by the vertical handles (the “horns”) and keep it tucked tightly against your chest. Your elbows should be pointing down.
- The Descent: Keeping your chest proud and your back straight, lower your hips down and back as if sitting in a chair.
- The Bottom Position: Go as deep as you comfortably can while keeping your heels on the floor. Your elbows should track between your knees.
- The Ascent: Drive through your feet to stand back up, squeezing your glutes at the top.
Common Mistakes
- Leaning Too Far Forward: Keep the kettlebell close to your body and your chest up.
- Letting Your Knees Cave In: Actively push your knees out as you squat.
Exercise 4 – The Halo

Why It’s More Than a Warm-Up
The Halo is a fantastic exercise for shoulder mobility, thoracic (upper back) spine rotation, and core stability. It helps “bulletproof” your shoulders for overhead movements.
How to Do It: Step-by-Step
- Setup: Hold the kettlebell upside down by the horns, directly in front of your chest.
- The Rotation: Slowly bring the kettlebell around your head in a circular “halo” motion. Keep it as close to your neck and head as possible.
- The Core: Your goal is to keep your ribcage and hips locked in place. Do not let your torso twist with the bell. Your core should be braced the entire time.
- Reverse: Complete your target reps in one direction, then switch directions.
Common Mistakes
- Moving Your Head: Your head should stay still while the bell moves around it.
- Rushing the Movement: This exercise is about control, not speed. Go slowly.
Exercise 5 – The Overhead Press

Why It Builds Strong, Stable Shoulders
Pressing a kettlebell overhead is different from pressing a dumbbell.
The offset weight forces all the small stabilizer muscles in your shoulder to work harder, building true strength and stability.
How to Do It: Step-by-Step
- The “Rack” Position: Start by “cleaning” the kettlebell to your shoulder. The bell should rest gently on your forearm, which is tucked into your chest. Your wrist should be straight.
- The Press: Brace your core and glutes. Press the kettlebell straight overhead until your arm is fully locked out. Your bicep should be near your ear.
- The Path: Don’t press the bell out and around your face; keep your forearm vertical the whole time.
- The Return: Lower the kettlebell back down to the rack position with control.
Common Mistakes
- Arching the Back: Squeeze your glutes and abs to keep your spine neutral.
- Bending Your Wrist: Keep your wrist straight and strong, in line with your forearm.
Your First Kettlebell Workout Routine
Start with this simple routine 2-3 times per week on non-consecutive days. Focus entirely on form.
Don’t forget to warm up! A few minutes of light cardio and dynamic stretching is essential. Check out our guide on The Art of the Warm-Up.
| Exercise | Sets & Reps | Rest |
| Halos | 2 sets of 5 reps per direction | 30 seconds |
| Goblet Squats | 3 sets of 8-10 reps | 60 seconds |
| Kettlebell Deadlifts | 3 sets of 8-10 reps | 60 seconds |
| Two-Handed Swings | 5 sets of 10 reps | 60 seconds |
Frequently Asked Questions (FAQ)
Q: How should I breathe during the kettlebell swing?
A: Use “power breathing.” Take a sharp sniff in through your nose as the bell goes back between your legs, and a sharp, powerful exhale (like a “Tss!”) through your teeth as you snap your hips forward.
Q: My forearms are getting bruised. What am I doing wrong?
A: This is common when learning the “clean” or holding the bell in the rack position. It usually means you are letting the kettlebell “flop” over your wrist instead of guiding it into place. For now, focus on the exercises listed here. Wrist guards can also help.
Q: Can I do these exercises every day?
A: No. Your muscles need time to recover and grow stronger. Stick to 2-3 sessions per week when starting out.
You’ve Got the Moves. Now, Let’s Talk Safety.
Mastering these five exercises will give you a powerful fitness foundation.
But to ensure you can do them for years to come, it’s crucial to understand the principles of training safely at home.
Next Step: Continue to our final guide in this series: Kettlebell Safety Tips for Home Use.