Congratulations on taking a fantastic step for your health by getting a treadmill! It’s a great investment.
Now, let’s talk about protecting that investment so it provides smooth, reliable workouts for years to come.
Treadmill maintenance might sound intimidating, but think of it less as a chore and more as simple “preventative care” for your machine – like giving it a regular health check-up!
This guide breaks down the essential, easy maintenance tasks into a simple checklist.
We’ll explain why these steps matter, how often to do them, and what basic supplies you’ll need.
Following these basics is key to ensuring your treadmill runs smoothly, stays safe, and supports your fitness goals long-term.
Remember, understanding proper use Treadmill Safety Guide and its features Key Treadmill Features Explained is step one; this maintenance guide is step two for a happy, healthy machine!
Why Bother With Maintenance? The Payoff for a Few Minutes of Care
Spending just a little time on basic upkeep offers significant rewards:
- Longer Lifespan: Simple maintenance helps prevent wear and tear on critical parts like the motor, belt, and deck, potentially saving you from costly repairs or needing a replacement sooner than expected. It truly protects your investment.
- Smoother & Quieter Performance: Regular care prevents issues like sticking belts, jerky movements, and annoying squeaks, leading to a much more enjoyable workout experience.
- Enhanced Safety: A well-maintained machine is a safer machine. Proper belt tension and condition reduce the risk of slipping, while overall upkeep minimizes the chance of unexpected malfunctions.
- Better Workouts: Let’s face it, a treadmill that runs smoothly just feels better to use, helping you stay focused and motivated.
- Warranty Protection: In some cases, manufacturers may require proof of basic maintenance if you need to make a warranty claim. Neglecting essential care could potentially void your coverage.
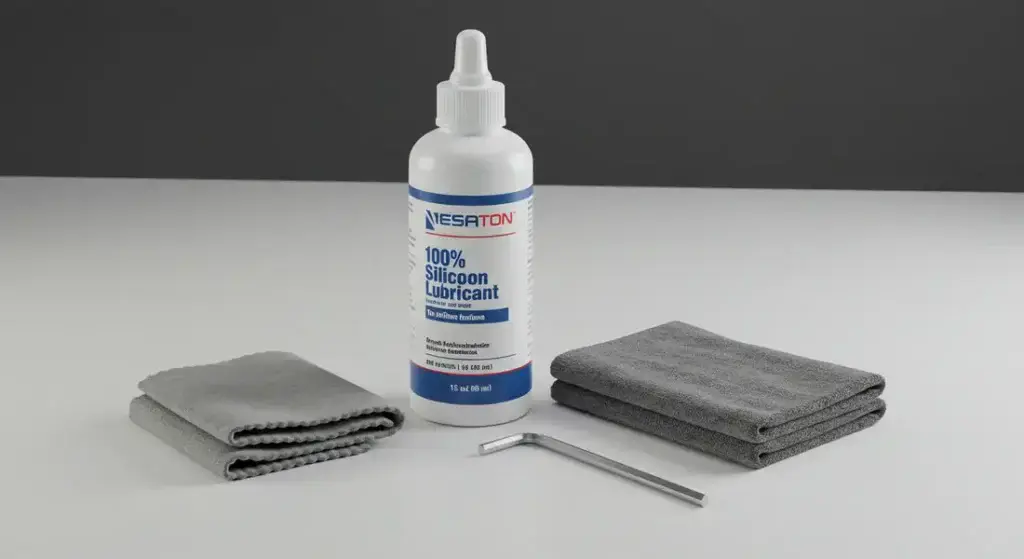
Your Basic Treadmill Care Toolkit – Simple Supplies You’ll Need
Good news! You don’t need a professional mechanic’s toolbox for basic care. Here’s what you’ll likely need:
- Microfiber Cloths: A few clean cloths are perfect for wiping down surfaces without scratching.
- Vacuum Cleaner: One with a hose and ideally a brush attachment to get into crevices and under the machine.
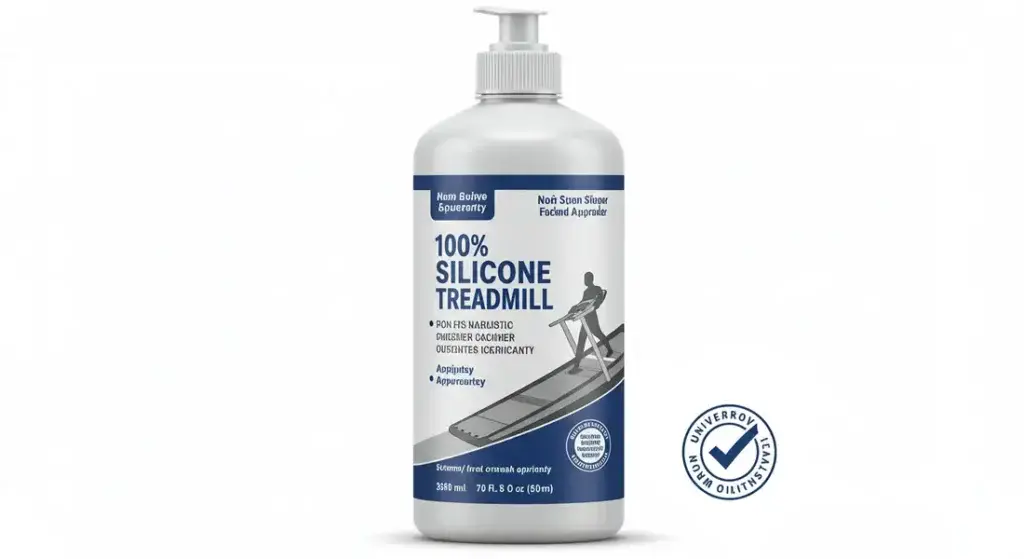
- Approved Treadmill Belt Lubricant: This is CRITICAL. Use only 100% silicone lubricant specifically designed for treadmills unless your treadmill’s manual explicitly recommends a different type. Check your manual! Using the wrong product (like WD-40, household oils, or petroleum-based lubricants) can seriously damage the belt and deck – learn why only specific silicone lubricants are safe for treadmills.
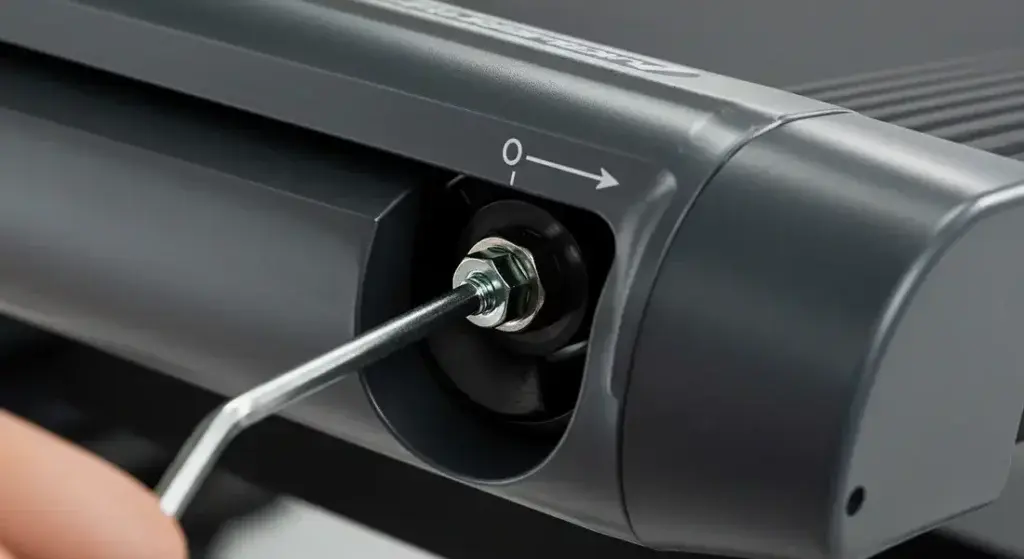
- Allen Wrench (Hex Key): Your treadmill likely came with the correct size needed for adjusting the rear roller bolts (for belt tension/alignment). Keep it handy!
- (Optional) Mild Cleaner: Sometimes a slightly damp cloth is enough. If you need more, check your manual for approved cleaning solutions (often just mild soap and water). Avoid harsh chemicals.
The Treadmill Health Checklist – Your Regular Maintenance Routine
Consistency is key! Break down maintenance into these manageable frequencies:
Here’s a quick summary of the essential tasks and recommended frequencies.
Remember to always consult your specific treadmill manual for detailed instructions and timing, especially for lubrication and adjustments.
| Maintenance Task | Frequency | Why It Matters (Briefly) |
| Wipe Down | After Every Workout | Removes corrosive sweat, keeps machine clean & hygienic. |
| Visual Scan & Quick Vacuum | Weekly | Spots issues early (belt centering, noise), removes dust. |
| Deeper Clean | Monthly / Bi-Monthly (Check Manual) | Thorough dust removal from under deck & motor area. |
| Belt Lubrication | Per Manual Schedule (Critical!) | Reduces friction, protects belt/deck/motor, ensures smooth run. |
| Check Belt Tension | When Lubricating / If Slipping | Prevents belt slippage (too loose) or strain (too tight). |
| Check Belt Alignment | When Lubricating / If Drifting | Ensures even wear, prevents edge damage. |
Now, let’s dive into the details of each task…
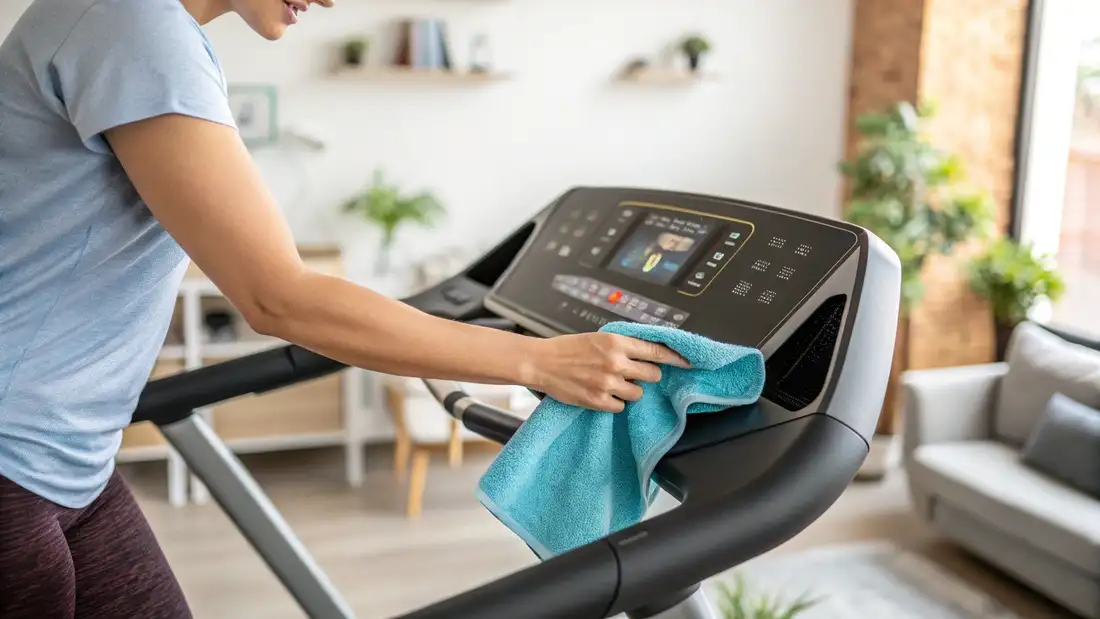
After Every Workout (The 1-Minute Wipe-Down)
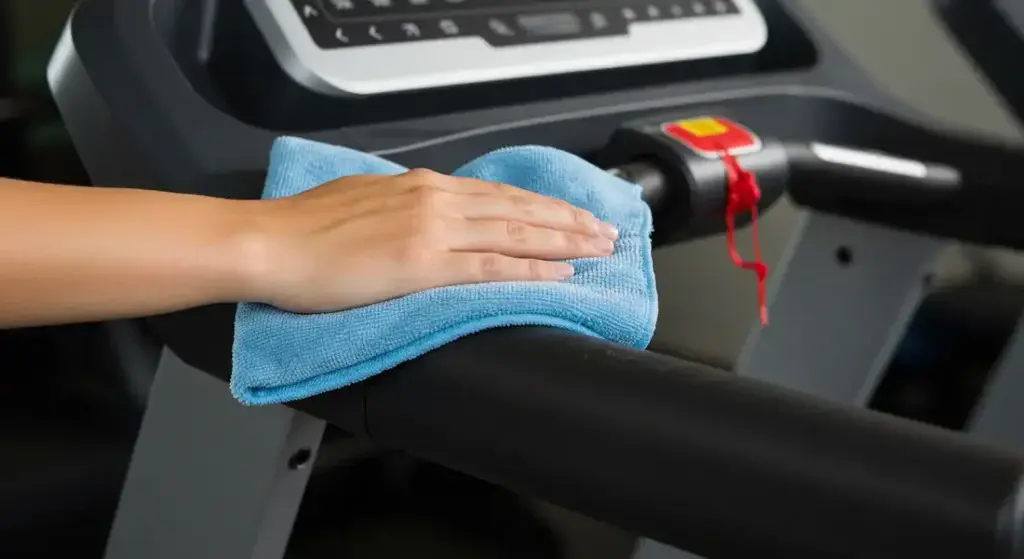
- Task: Grab a microfiber cloth (dampen it very slightly with water if needed, but check your manual first – never spray liquid directly on the console). Wipe down the console, handlebars, side rails, and any parts of the frame or deck where sweat might have landed.
- Why: Sweat contains salts and acids that can corrode finishes and potentially damage electronics over time. This quick wipe keeps things clean, hygienic, and looking good.
- Frequency: Every single time. Make it part of your cool-down habit!
Weekly Check-Up (The 5-Minute Visual Scan & Tidy)
Task:
- Look: Walk around the machine. Does the belt look like it’s running roughly in the center of the deck? Do you see any obvious fraying or damage on the belt edges? Are any bolts on the frame visibly loose?
- Listen: Turn the treadmill on at a slow speed (stand beside it, not on it for this check). Listen for any new or unusual noises – grinding, rhythmic squeaking, clicking?
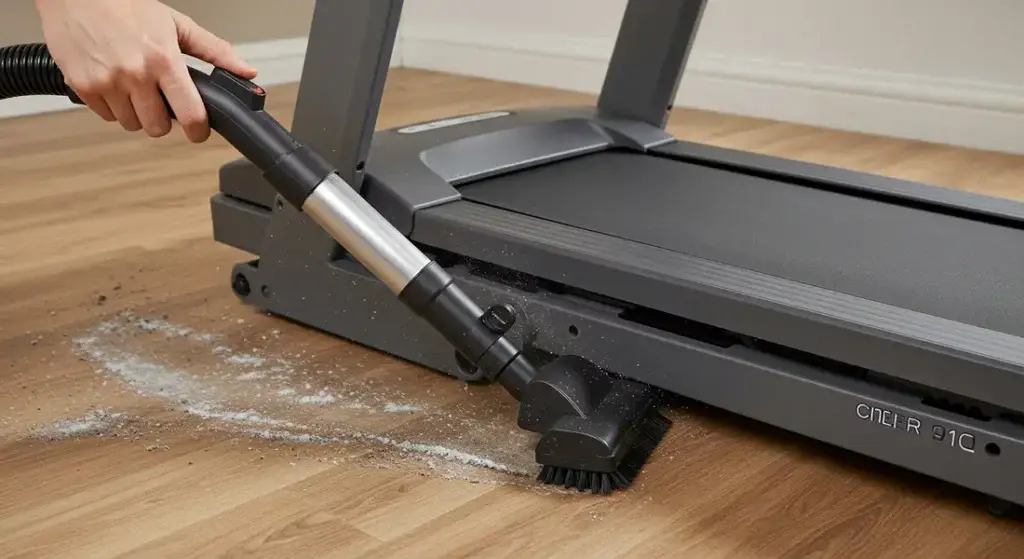
- Vacuum: Use your vacuum’s hose attachment to quickly clean around the edges of the treadmill and underneath as far as you can easily reach. Pay attention to the area near the motor cover vents (usually at the front).
- Why: This quick scan helps you spot potential issues early before they worsen. Removing dust and pet hair prevents it from being sucked into the motor compartment, where it can cause overheating and damage.
- Frequency: Just once a week takes only a few minutes.
Monthly/Bi-Monthly Deep Dive (The Core Preventative Care – Check Your Manual!)
Task 1: Deeper Cleaning
- Time for a more thorough vacuuming. If your manual allows and it’s safe to do so (some models lift slightly or require unplugging first), carefully vacuum under the deck more completely.
- Use a brush attachment on the motor cover vents to clear dust.
- Give the entire machine a good wipe-down.
Task 2: Belt Lubrication (The MOST Crucial Task!)
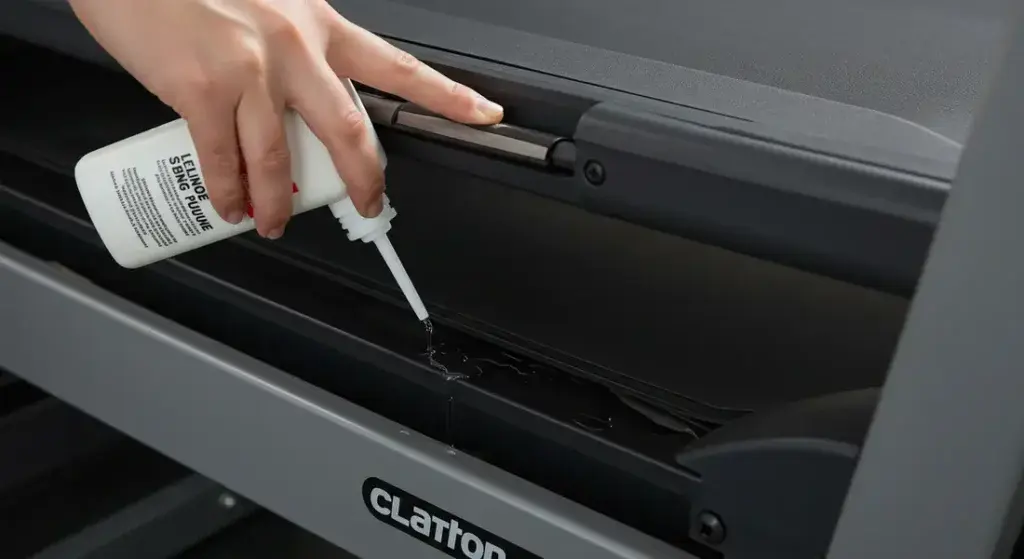
- Why: This is arguably the single most important maintenance task for treadmill longevity. Lubricant creates a slippery surface between the underside of the moving belt and the stationary deck it slides over. This drastically reduces friction, which protects the belt from wearing out, prevents the deck from damage, and reduces the strain on the motor (helping it run cooler and last longer).
- How Often: This is highly variable based on your treadmill model and how much you use it. YOU MUST CHECK YOUR TREADMILL’S MANUAL. Some require it every 3 months, some every 6 months, some based on mileage (e.g., every 150 miles). Do not guess, and do not over-lubricate, as too much can also cause problems.
- How (General Steps – FOLLOW YOUR MANUAL PRECISELY):
- Turn off and unplug the treadmill (usually recommended) – following basic electrical safety practices for home appliances is always recommended before performing maintenance involving internal components or liquids
- Your manual may instruct you to loosen the rear roller bolts slightly (using the Allen wrench) to slacken the belt for easier access underneath.
- Lift one edge of the belt carefully.
- Apply the approved silicone lubricant directly onto the deck surface under the belt, typically in a thin stream or specific pattern (e.g., down the center, or in an ‘S’ shape – your manual will specify the pattern and amount).
- Repeat on the other side if instructed. Avoid getting lubricant on the top surface of the belt.
- If you loosened the belt, re-tighten the rear roller bolts to their original position (count the turns!).
- Wipe away any excess lubricant from the edges.
- Plug in and turn on the treadmill. Walk on it at a slow speed (e.g., 2-3 mph) for 3-5 minutes to help spread the lubricant evenly across the deck.
Task 3: Check Belt Tension & Alignment
While you’re doing the deeper clean/lube, it’s a good time to check these:
- Why: An improperly tensioned belt can slip (too loose) or put excessive strain on the motor and rollers (too tight). A belt that runs off-center will wear unevenly on the edges and could eventually get damaged.
- How (General Checks – Refer to Manual for Specifics):
- Tension: Your manual will likely describe how much you should be able to lift the edge of the belt in the center (e.g., 2-3 inches). Check this carefully.
- Alignment: Turn the treadmill on and watch the belt run at a slow speed for a minute. Does it stay centered, or does it drift consistently to one side?
- Adjustment (Use Allen Wrench on Rear Roller Bolts – MAKE TINY ADJUSTMENTS!):
- Tension: To tighten (if slipping), turn both rear roller bolts clockwise by the exact same small amount (e.g., 1/4 turn). To loosen, turn both counter-clockwise equally. Re-check tension.
- Alignment: If the belt drifts LEFT, make a tiny clockwise turn (e.g., 1/4 turn) on the LEFT bolt ONLY. If it drifts RIGHT, make a tiny clockwise turn on the RIGHT bolt ONLY. Let it run for a minute to see the effect before adjusting further. Small adjustments are key!
Frequency: Check alignment/tension when you lubricate, or more often if you notice issues (slipping/drifting).
Lubrication frequency is dictated by your manual.
Listening to Your Treadmill – Basic Troubleshooting Through Maintenance
Sometimes your treadmill might give you clues it needs attention. Here are common ones linked to basic maintenance:
- Symptom: Belt briefly hesitates or slips underfoot, especially when your foot first lands.
- Possible Fix: Belt tension might be too loose. Check and adjust carefully per your manual. Could also indicate a worn belt nearing replacement time.
- Symptom: Walking belt is clearly running over to one side and staying there.
- Possible Fix: Belt alignment needs adjustment. Follow manual instructions using the rear roller bolts (tiny turns!).
- Symptom: A rhythmic squeaking noise as the belt goes around.
- Possible Fix: Often means the belt/deck needs lubrication (check your schedule/manual!). Could also be debris caught somewhere (check during cleaning) or rarely, a roller issue.
- Symptom: A persistent grinding noise or a sudden loud bang/clunk.
- Action: STOP immediately, unplug the treadmill. This likely indicates a more serious mechanical issue (motor, roller bearing) requiring professional diagnosis.
- Symptom: Burning smell from the motor area.
- Action: STOP immediately, unplug. This is serious. Could be motor strain (often due to lack of lubrication) or an electrical issue. Call a professional.
Know Your Limits – When to Call a Professional Technician
Basic maintenance can prevent many problems, but some issues require expert help.
Don’t hesitate to call a qualified treadmill technician if:
- You experience any major electrical issues (error codes you can’t resolve via the manual, unresponsive console, tripping breakers, burning smells).
- You hear loud grinding, banging, or knocking noises from the motor or rollers.
- You are uncomfortable or unsure about performing belt lubrication or adjustments even after carefully reading your manual. (It’s better to pay a pro than damage your machine!).
- The treadmill won’t power on at all (after checking basics like the plug and circuit breaker).
- You see obvious physical damage to the frame, deck, or other critical components.
Conclusion
Taking care of your treadmill doesn’t require an engineering degree!
By following this simple “Health Checklist” – wiping down after each use, doing a quick weekly scan and vacuum, and performing the crucial periodic lubrication and belt checks according to your specific manual – you’re doing the most important things to ensure its longevity.
Think of it as a partnership: you provide the sweat equity during workouts, and a few minutes of consistent maintenance keep your trusted machine ready for the next session.
This proactive care protects your investment, enhances safety, and guarantees smoother, happier miles ahead!
Ready to keep your fitness journey on track?
Make sure every workout is safe: Review our Treadmill Safety Guide.
Curious if your treadmill has the right features for the long haul? Revisit Key Treadmill Features Explained.
Need the bigger picture? Head back to the main Page Ultimate Beginner’s Guide to Treadmills.