You’ve learned the ‘why’ behind foam rolling and have successfully chosen the perfect tool from the many types of foam rollers available.
Now it’s time to learn the ‘how’.
Proper technique is everything.
It transforms the foam roller from a simple piece of foam into a precision tool for muscle recovery.
Rolling too fast or with the wrong posture won’t deliver the results you’re looking for and can even lead to bruising or injury.
“Proper technique is everything. It transforms the foam roller from a simple piece of foam into a precision tool for muscle recovery.
According to leading fitness authorities like the NIH, rolling too fast or with the wrong posture won’t deliver the results you’re looking for and can even lead to bruising or injury.
This simple 5-step guide will teach you the correct, safe, and most effective way to use your foam roller.
Before You Start – The Pre-Roll Checklist
Before you get on the floor, take a moment to set yourself up for success:
- Find Enough Space: You’ll need enough room to lie on the floor and move around freely without bumping into furniture. A yoga mat can provide extra comfort.
- Wear Comfortable Clothing: Choose fitted athletic wear. Baggy clothes can get caught under the roller, making the process awkward and distracting.
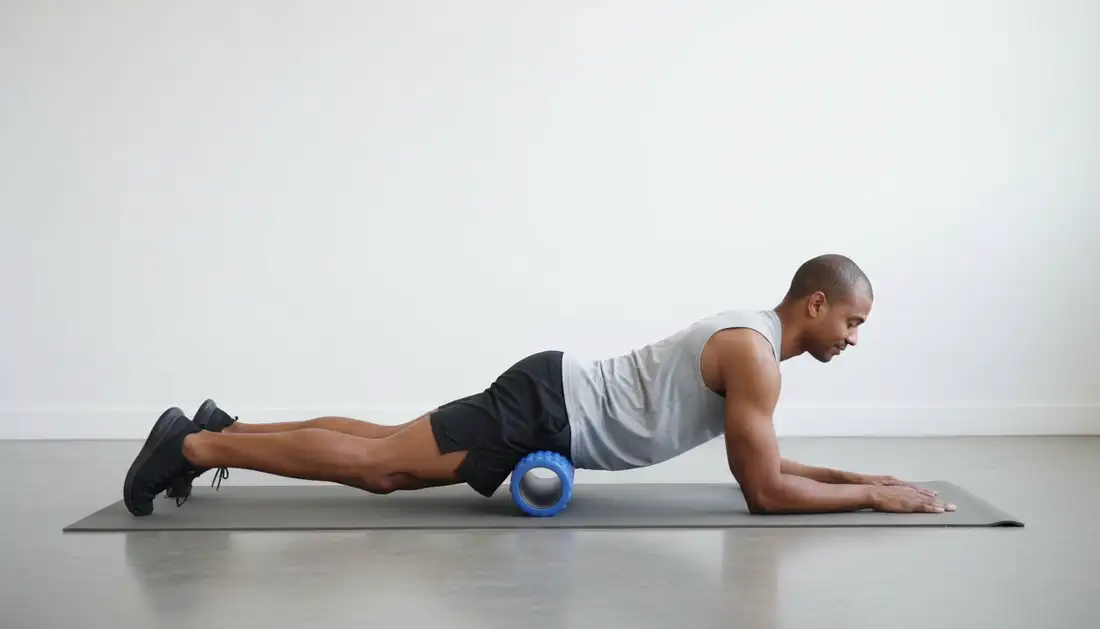
Step 1: Positioning Your Body
Begin by identifying the muscle group you want to work on.
Sit or lie on the floor and place the foam roller under the target area.
Gently and slowly lower your body weight onto the roller until you feel a moderate amount of pressure.
Use your hands and feet to support and control your body weight.
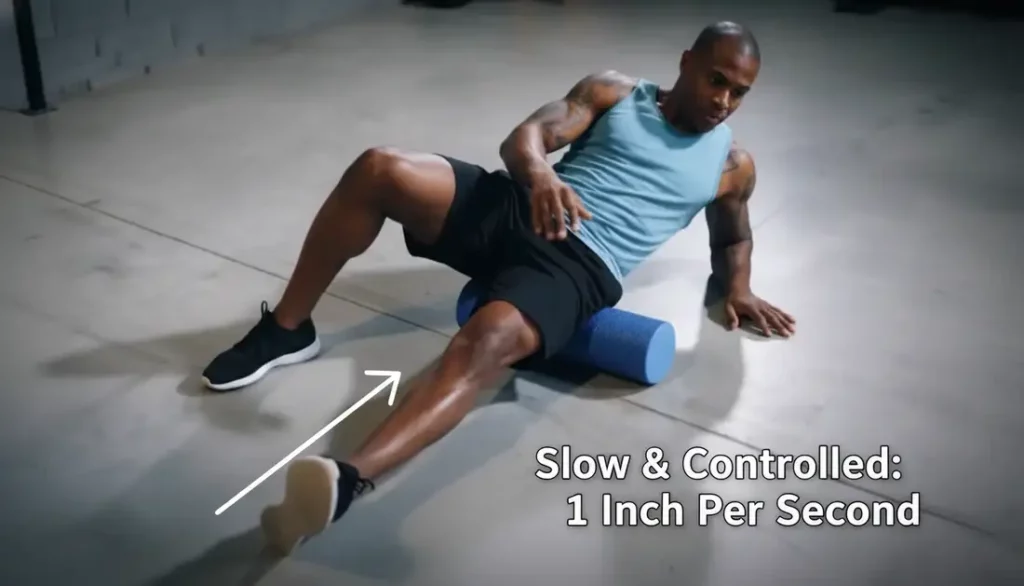
Step 2: The Art of the Slow Roll (Pacing is Everything)
This is the most common mistake beginners make.
The goal is not to speed through the movement.
To be effective, you must roll slowly to give your brain and muscles time to connect and relax.
- The Golden Rule: Aim to move no faster than one inch per second.
- The Motion: Scan the entire length of the muscle with slow, deliberate rolls. For example, to roll your hamstring, you would start just above the back of your knee and slowly roll all the way up to the base of your glute.
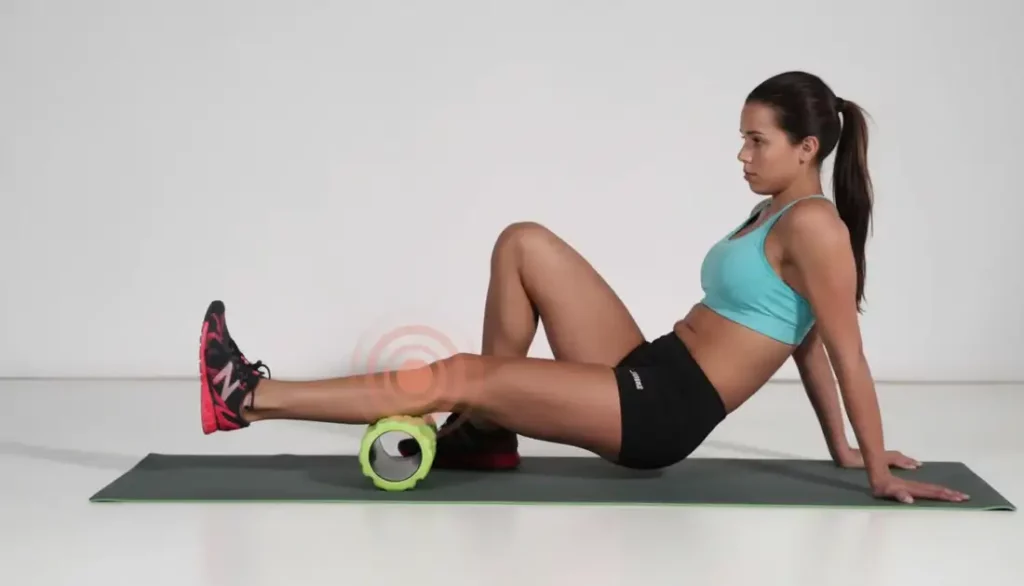
Step 3: Finding and Holding on Tender Spots (Trigger Points)
As you slowly roll, you will inevitably find areas that are more tender than others.
These are the trigger points or “muscle knots” that need releasing. Don’t just roll over them!
How Long to Hold?
When you find a tender spot, stop rolling and hold your position, applying gentle, constant pressure directly on that spot.
Maintain this hold for 20 to 30 seconds.
You should feel the muscle start to release or the discomfort begin to fade.
If the pain is too intense, slightly shift your body to reduce the pressure.
What Does “Good Pain” Feel Like?
You should feel a manageable level of discomfort, not sharp, stabbing, or unbearable pain.
It’s a sensation of pressure and tenderness that you can breathe through.
If the pain makes you hold your breath or tense up your entire body, you are applying too much pressure.
According to experts in physical therapy, pushing through sharp pain can do more harm than good by causing inflammation.
Step 4: The Power of Breathing
Your breath is a powerful tool for relaxation.
When you hold your breath, your muscles tense up, which is the opposite of what you want.
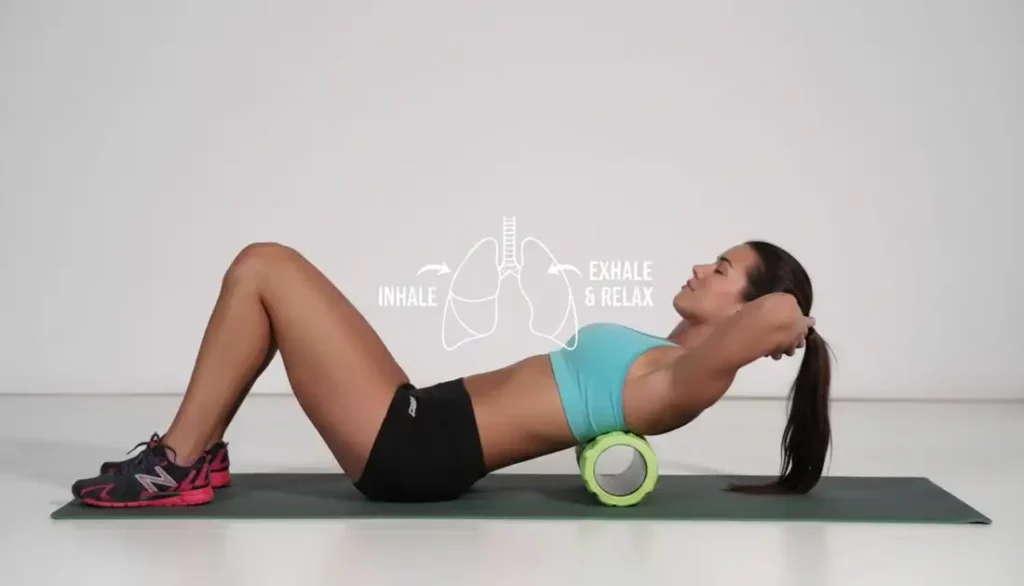
Focus on slow, deep, and controlled breathing throughout your entire session.
As you hold on a tender spot, take a deep inhale, and as you exhale, try to relax your muscle even more, sinking deeper into the roller.
Proper breathing is a cornerstone of any effective exercise, and learning to breathe better during your workouts will enhance your foam rolling sessions dramatically.
Step 5: How Often and How Long to Roll
Consistency is far more important than intensity or duration.
- For Beginners: Aim for 3-4 sessions per week on non-consecutive days to allow your body to adapt.
- Duration: Spend about 1-2 minutes per major muscle group. A full-body routine for a beginner shouldn’t take more than 10-15 minutes.
Key Takeaways: The 5 Steps to a Perfect Roll
| Step | Action | The Goal |
| 1. Position | Gently lower the target muscle onto the roller. | Find the starting point without shocking the muscle. |
| 2. Slow Roll | Move at a pace of one inch per second across the muscle. | Scan for tender spots (trigger points). |
| 3. Hold | Pause on a tender spot for 20-30 seconds. | Allow the muscle knot to release under pressure. |
| 4. Breathe | Take slow, deep breaths, especially while holding. | Signal your muscles to relax and let go of tension. |
| 5. Repeat | Continue on other muscle groups, aiming for 10-15 minutes total. | Be consistent to achieve long-term benefits. |
Frequently Asked Questions
Q: Should I foam roll before or after a workout?
A: You can do both! Rolling before a workout for 5-10 minutes can act as a dynamic warm-up to increase blood flow and mobility. Rolling after a workout helps to kick-start the recovery process and reduce muscle soreness. If you have to choose one, most people will get more benefit from rolling after their workout or on rest days.
Q: What should I do if a spot is too painful to roll directly?
A: Never force it. If a trigger point is too sensitive for direct pressure, simply roll the areas around it. This will still help increase blood flow and can help the muscle knot begin to release indirectly. You can also use your hands and feet to lift some of your body weight off the roller to decrease the intensity.
You’ve Mastered the Technique, Now Let’s Move!
Technique? Check!
You now have the knowledge to use your foam roller like a pro—safely, effectively, and with confidence.
Of course, having the right tool is just as important as having the right technique.
If you realized your current roller isn’t a good fit, or if you’re ready to buy your first one, be sure to check our updated guide on the best foam rollers for muscle recovery.
Now, let’s put this technique into practice with a structured routine.
It’s time to roll!
Let’s get started with our visual guide to the Basic Foam Rolling Exercises for Major Muscle Groups.