Disclosure: As an Amazon Associate, I earn from qualifying purchases. This technical audit contains affiliate links which support our research at no cost to you.

Abstract: Remote office environments generate progressive spinal dysfunction.
We analyze the mechanics of “Tech Neck” and forward pelvic tilt in remote workers.
This audit delivers an actionable protocol to restore structural balance using simple tools.
We target cervical relief, thoracic expansion, and deep hip flexor length recovery.
1.0 Understanding the Desk Worker’s Hip Flexor Dilemma
Your hip flexors run from your lower spine and pelvis to your thigh bones.
The primary muscle of this group is the psoas.
The psoas is the only muscle connecting your upper body directly to your lower body.
When you sit for extended periods, these muscles remain in a shortened position.
Over time, this constant flexion leads to adaptive muscle shortening and joint stiffness.
A shortened psoas pulls on the lumbar vertebrae, producing chronic lower back and hip joint pain.
2.0 Symptom Checklist: Is Your Workstation Damaging Your Joints?
Desk workers often experience a cluster of symptoms caused by silent postural decay.
Review this checklist to determine if your workstation is causing mechanical dysfunction:
| Symptom Location | Underlying Postural Cause | Diagnostic Sign |
|---|---|---|
| Hips & Groin | Adaptive shortening of the psoas | Stiffness when standing up straight after sitting |
| Lower Back | Anterior pelvic tilt pulling on lumbar vertebrae | Dull ache that intensifies late in the workday |
| Cervical Spine | Forward head translation (Tech Neck) | Sharp pinching behind the shoulder blades |
| Digestive Tract | Visceral compression from slouched posture | Bulging lower stomach despite healthy weight |
3.0 Workstation Ergonomics: Technical Alignment & Products
Small adjustments to your primary workspace can significantly reduce skeletal stress.
Use this technical framework to configure your desk setup:
3.1 Chair Height & Pelvic Rotation
Set your chair height so your feet rest completely flat on the floor.
Your knees should maintain a 90-degree angle with your thighs parallel to the ground.
To prevent pelvic tilting, use a supportive seat cushion.
Hbada Ergonomic Office Chair
- Dynamic lumbar spine support
- Mesh fabric back for cooling
- Saves hip compression stress
LoveHome Memory Foam Cushion
- Premium high-density foam
- Corrects pelvic tilt angle
- Fits most standard desk chairs
3.2 Monitor and Shoulder Positioning
Position the top third of your computer screen directly at eye level.
This prevents you from tilting your chin down, which strains the cervical spine.
Using an adjustable monitor mount helps you maintain an upright head position.
VIVO Single Monitor Adjustable Desk Mount
- Full motion articulation and height settings
- Lifts screens to eliminate cervical neck flexion
- Clamps securely to standard desks
4.0 Active Posture Restoration: Simple Desk Stretches
Perform these simple stretches directly at your desk every 60 to 90 minutes.
These exercises restore circulation and release locked muscle fibers.
- The Seated Hip Flexor Stretch: Sit at the edge of your chair, extend one leg behind you with the knee bent, and tuck your pelvis under until you feel a stretch in the front of your hip.
- The Chair Pigeon Stretch: Cross your right ankle over your left knee, keep your foot flexed, and hinge forward from the waist with a straight spine.
- The Seated Figure Four: Cross your ankle over your opposite thigh, press down gently on the bent knee, and hold for 30 seconds.
5.0 Foam Rolling Masterclass (Myofascial Release Techniques)
Stretching alone is often insufficient to resolve chronic muscle tightness.
Foam rolling targets the fascia, which is the connective tissue surrounding your muscles.
Applying pressure releases fascial adhesions, letting your muscles slide and contract smoothly.
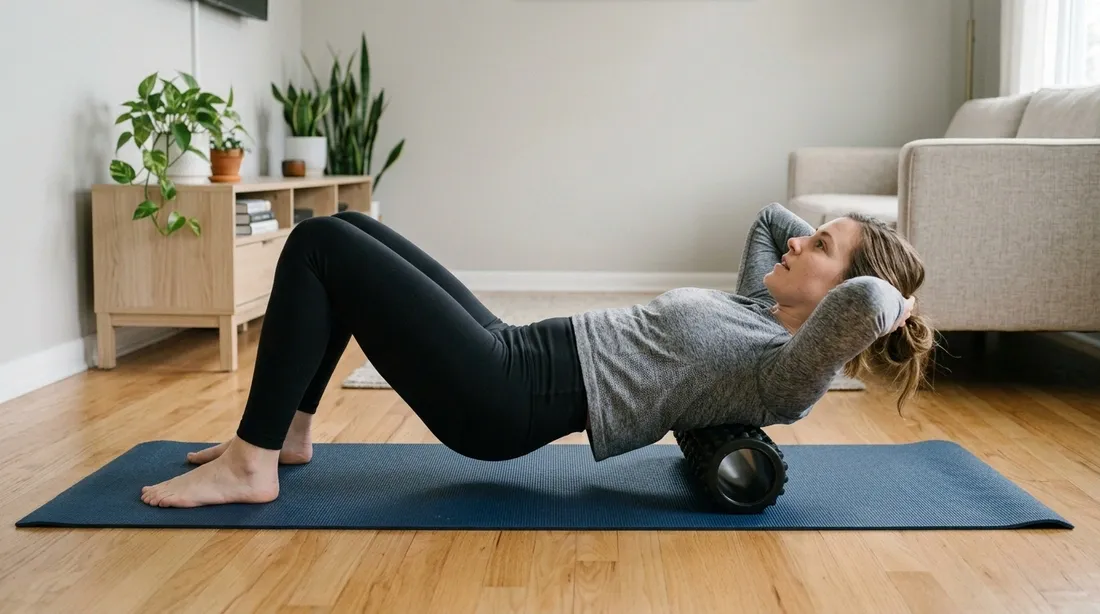
Technique: Place the roller across your upper back, support your neck, and arch backward gently.
Warning: Never foam roll your direct lower lumbar spine or your direct cervical neck bones.
TriggerPoint GRID Foam Roller
- Multi-density patterned exterior
- Channels oxygen and blood to tissue
- Durable hollow core design
TRX High-Density Foam Roller
- Expanded polypropylene build
- Sustains heavy loading without flattening
- Ideal for full thoracic stretches
6.0 Advanced Mobility: The Sequential Flow Method
Because the psoas is buried deep inside the abdominal cavity, standard exercises cannot reach it.
To fully release tight hip flexors, you must follow a specific sequence of movements.
Unlock Your Hip Flexors: The Sequential Flow
Developed by Kinesiologist Rick Kaselj, the Sequential Flow Method uses a 10-step movement pattern to safely release deep psoas restrictions.
This home program contains clear, step-by-step instructional videos that allow you to loosen your hips in under 15 minutes a day.
It is highly recommended for desk workers suffering from chronic lower back and hip stiffness.
Learn More About the Sequential Flow Method7.0 Technical FAQ
It provides immediate pelvic alignment relief, but you must pair it with regular hip stretches and glute strengthening for permanent results.
If you experience a dull ache in your lower back when standing up straight after sitting, your hip flexors are likely shortened.
Yes, but do not use it directly on your neck bones. Use it strictly on your upper back (thoracic area) to relieve tension indirectly.
You can feel immediate tension relief after one session, while permanent flexibility improvements develop over 2 to 4 weeks of consistent rolling.