Tag: Lower Back Pain

  • The Best Foam Rollers for Sciatica Pain Relief (and How to Use Them Safely)

    The Best Foam Rollers for Sciatica Pain Relief (and How to Use Them Safely)

    That sharp, shooting pain that radiates from your lower back, through your hip, and down your leg is unmistakable.

    Sciatica can be debilitating, and when you’re in pain, you’ll do almost anything to find relief.

    A comparison image showing the dangerous way to foam roll for sciatica (on the lower back) versus the safe way (on the glute muscle)

    A foam roller can be a powerful ally in this fight, but the approach is completely counterintuitive.

    Using it incorrectly will not only fail to help but could make your pain significantly worse.

    This guide is built on one principle: safety first.

    We will explain why you must avoid the site of the pain, recommend the right type of gentle roller for this sensitive condition, and teach you a safe, physical-therapist-approved routine that targets the root cause of your sciatica.

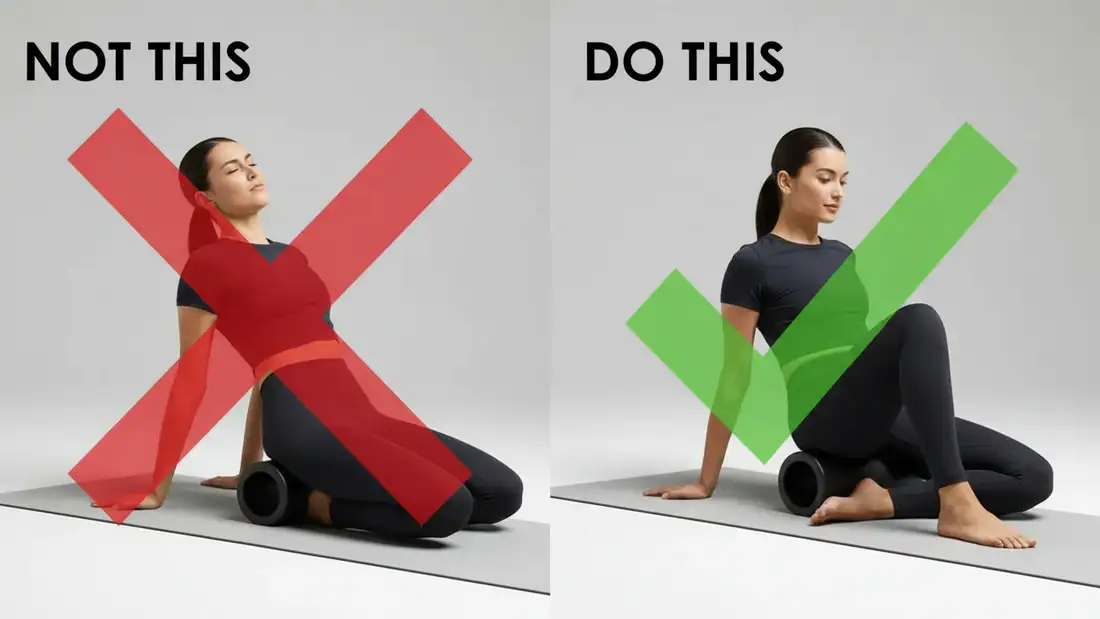
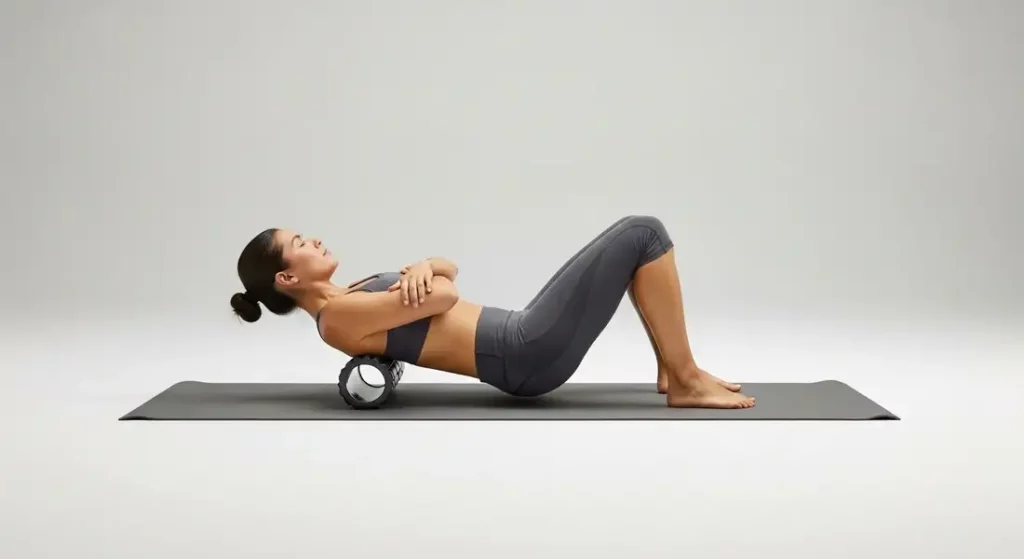
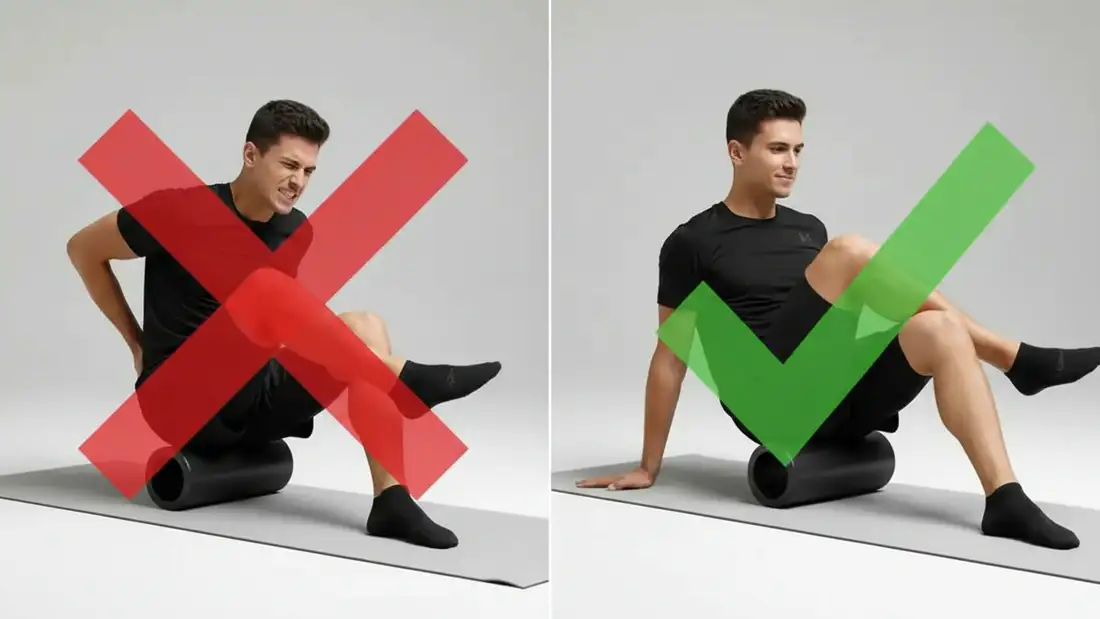
    The Golden Rule – NEVER Roll Directly on Your Lower Back or Sciatic Nerve

    If you remember only one thing from this article, let it be this: do not roll your lower back or the path of the pain down your leg.

    Your sciatic nerve is the longest nerve in your body, running from your lower spine down your leg.

    When it’s irritated, it’s already inflamed and compressed.

    Rolling directly on it is like pressing on a bruised, sensitive nerve—it can dramatically increase inflammation and sharpen your pain.

    This is one of the most critical errors we highlight in our guide to 7 Common Foam Rolling Mistakes.

    How Foam Rolling Safely Helps Sciatica by Targeting the Cause

    So, how does foam rolling help?

    By treating the cause, not the symptom.

    While sciatica can have several causes, a very common one is Piriformis Syndrome.

    As the medical experts at Spine-Health explain in detail, this is a condition where the piriformis muscle, located deep in the buttocks, spasms and irritates the nearby sciatic nerve.

    Think of your sciatic nerve as a garden hose.

    The piriformis is a small, deep muscle in your glutes that runs directly over this “hose.”

    When the piriformis muscle becomes tight and knotted, it clamps down and “pinches the hose,” compressing the sciatic nerve and causing pain.

    An anatomical diagram showing how a tight piriformis muscle can compress the sciatic nerve, which is a common cause of sciatica pain
    Sciatica pain is often a symptom of a tight piriformis muscle compressing the sciatic nerve.

    Our goal is to release the tension in the muscles that are pinching the nerve.

    The three key targets are:

    1. The Piriformis: The primary culprit.
    2. The Glutes: The larger muscles surrounding the piriformis.
    3. The Hamstrings: Tight hamstrings can tilt the pelvis, contributing to piriformis tightness.

    By releasing these muscles, you take the pressure off the sciatic nerve, providing lasting relief.

    What to Look for in a Foam Roller for Sciatica

    When you’re dealing with nerve pain, gentleness is key.

    The wrong tool can do more harm than good.

    • Density: Start Soft. A rock-hard, high-density roller is too aggressive for sciatica. You need a soft or medium-density roller that can release muscle tension without inflaming the underlying nerve.
    • Texture: Keep it Smooth. Textured rollers with aggressive knobs can irritate the sensitive piriformis area. A smooth surface provides broad, consistent pressure, which is much safer and more comfortable.
    • The Pro Tool: A Massage Ball. For a more advanced and precise approach, a massage ball (like a lacrosse ball) is the best tool for targeting the deep, specific trigger point in the piriformis muscle.

    The 3 Best Foam Rollers & Tools for Sciatica Relief

    1. OPTP PRO-ROLLER Soft – The Gentle Beginner’s Choice

    The soft-density OPTP PRO-ROLLER, our pick for the best foam roller for beginners.
    OPTP-PRO-ROLLER-Soft-Foam-Roller

    When you are in acute pain, you need the gentlest tool possible.

    The OPTP PRO-ROLLER is made from a durable, soft closed-cell foam that provides forgiving compression.

    It allows you to gently release your glutes and hamstrings without the intense pressure that could aggravate your sciatica.

    DensitySurfaceBest For
    SoftSmoothAcute pain, high sensitivity

    2. TriggerPoint GRID – The Versatile All-Rounder

    The TriggerPoint GRID foam roller with its patented multi-density surface, our pick for the best overall foam roller
    TriggerPoint-GRID-Foam-Roller

    If your pain is less acute or you want a roller that will grow with you, the TriggerPoint GRID is a perfect medium-density choice.

    Its flat surfaces act like a smooth roller, providing consistent pressure, while its hollow core gives it a firmness that is effective but not overly aggressive.

    DensitySurfaceBest For
    Medium-FirmLightly TexturedGeneral use, post-acute pain

    3. Kieba Lacrosse Ball – The Piriformis Pinpointer

    A lacrosse ball, the expert's tool for pinpointing and releasing the deep piriformis muscle to relieve sciatica
    For targeted relief, a massage ball is the most effective tool for releasing the deep piriformis knot

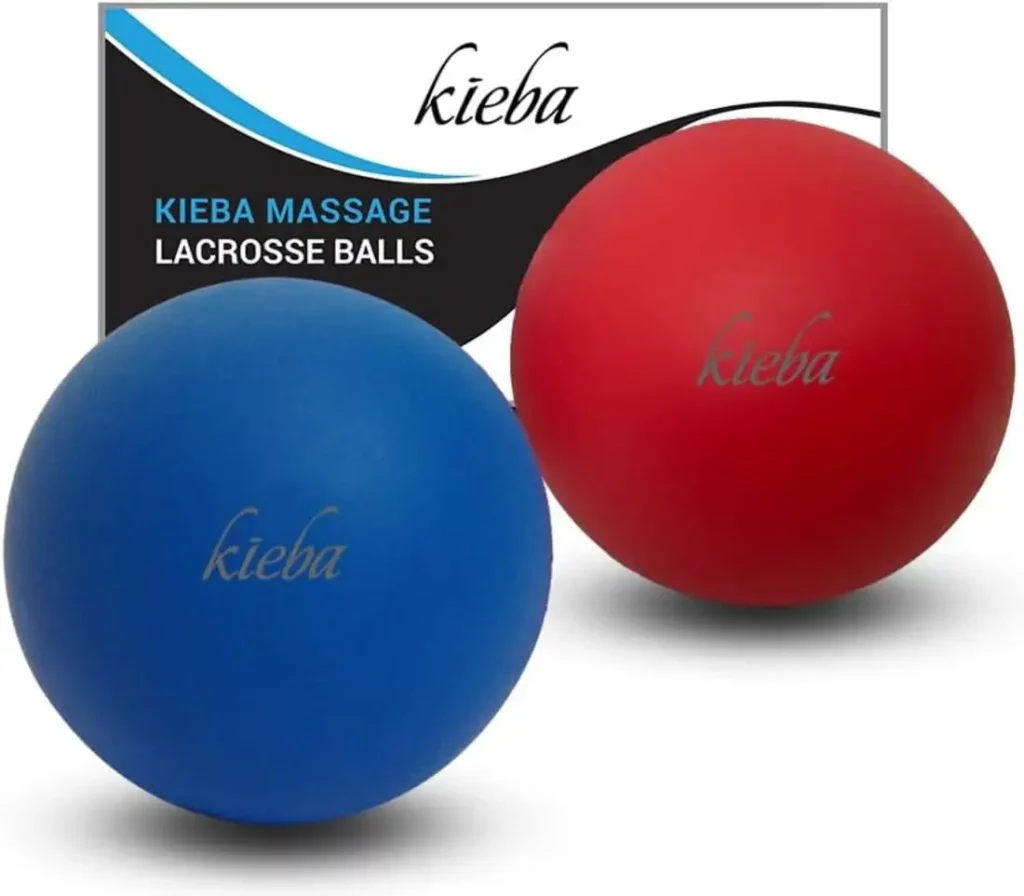
    A foam roller is great for the larger glute and hamstring muscles, but a lacrosse ball is the expert’s choice for targeting the piriformis itself.

    Its small, firm surface allows you to apply precise pressure directly to the knot that is causing the problem.

    DensitySurfaceBest For
    Extra-FirmSmoothPinpoint piriformis release

    The Safe 3-Move Routine for Sciatica Relief

    Perform this routine slowly and gently.

    If you feel any sharp or radiating nerve pain, stop immediately.

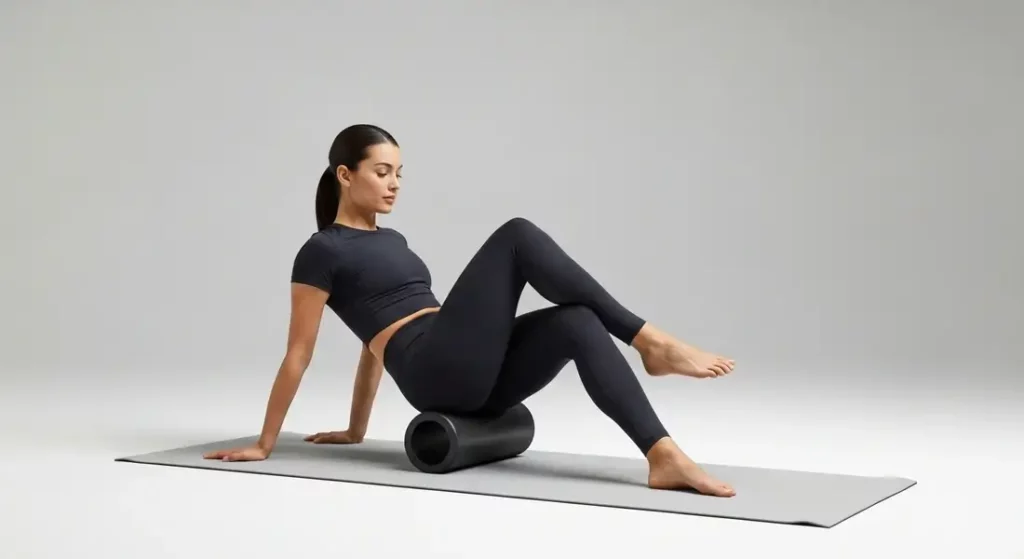
    1. The Glute & Piriformis Roll

    A person performing the safe and gentle glute and piriformis roll with a soft foam roller to relieve sciatica pain
    The figure-four glute roll is the safest and most effective way to release the piriformis muscle
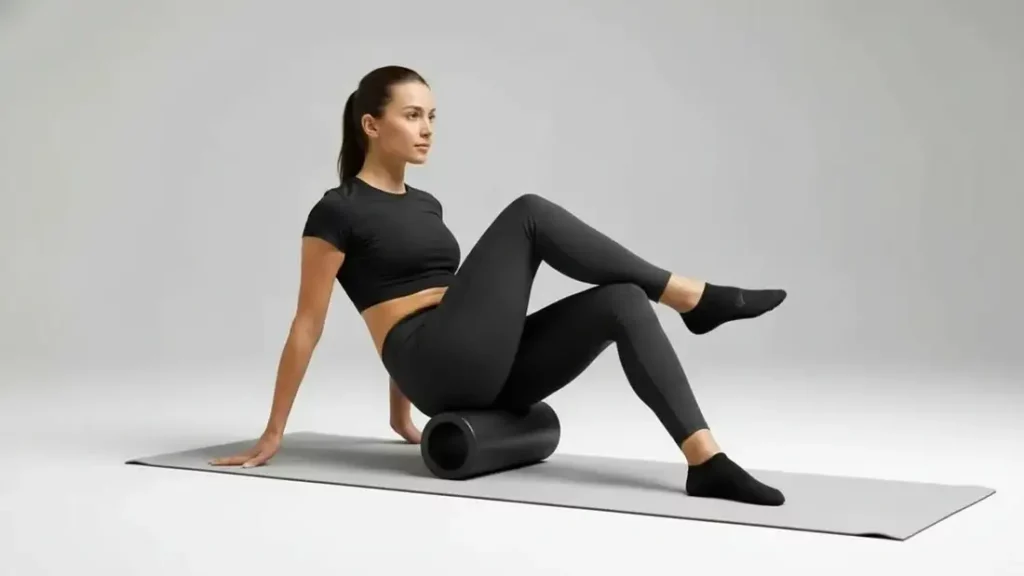
    1. Sit on the floor (not the roller) and place the foam roller behind you.
    2. Lean back and place the glute of your affected side on the roller. Use your hands and other foot for support.
    3. Slowly and gently roll over the fleshy part of the glute to warm up the area.
    4. To target the piriformis: Cross the ankle of your affected leg over the opposite knee (a “figure-four”). Gently tilt your weight toward the affected hip and make very small, subtle movements on any tender spots. Hold for 15-20 seconds.

    2. The Hamstring Roll

    A person using a soft foam roller on their hamstring to reduce pelvic tilt and help alleviate sciatica symptoms
    Releasing tight hamstrings helps to neutralize pelvic tilt, taking pressure off the lower back
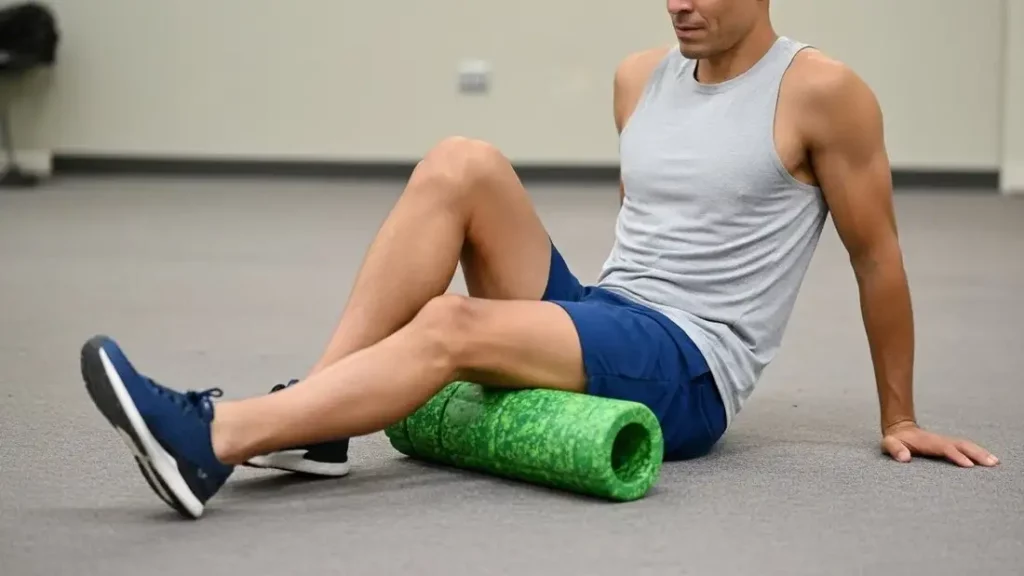
    1. Sit with the roller under your hamstrings.
    2. Support your weight with your hands and lift your hips.
    3. Roll slowly from the base of your glutes to just above the back of your knee. Releasing the hamstrings helps to neutralize the tilt of your pelvis.

    3. The Seated Piriformis Stretch (No Roller Needed)

    A person demonstrating the seated piriformis stretch in a chair, a safe and effective stretch for sciatica relief
    The seated piriformis stretch is a safe, no-roller-needed exercise to gently release the deep hip muscles
    1. Sit in a sturdy chair with your feet flat on the floor.
    2. Cross the ankle of your affected leg over your opposite knee.
    3. Keeping your back straight, gently lean your chest forward until you feel a deep stretch in your glute and hip.
    4. Hold for 30 seconds, breathing deeply. Do not bounce.

    Key Takeaways – The Sciatica Safety Protocol

    Do ThisDon’t Do This
    ✅ Roll the glutes and hamstrings.❌ NEVER roll your lower back.
    ✅ Use a soft or medium-density roller.❌ Don’t use an aggressive, hard roller.
    ✅ Move slowly and gently.❌ Don’t roll quickly or apply heavy pressure.
    ✅ Stop if you feel nerve pain.❌ Don’t try to “push through” sharp pain.

    Frequently Asked Questions (FAQ)

    Q: Can foam rolling make sciatica worse?
    A: Yes, absolutely. If you roll directly on your lower back or sciatic nerve path, you can increase inflammation and make the pain significantly worse. You must follow the safe protocol of only rolling the connecting muscles like the glutes and hamstrings.

    Q: How often should I do this routine for sciatica?
    A: You can perform this gentle routine 1-2 times per day. The key is to be gentle and consistent. Stop if your symptoms worsen.

    Q: When should I see a doctor for sciatica?
    A: A foam roller is not a substitute for medical advice. According to medical authorities like the Mayo Clinic, you should see a doctor immediately if you experience severe pain, numbness or muscle weakness in your leg, or have trouble controlling your bladder or bowels.

    Conclusion – A Safe and Smart Approach to Relief

    When you’re dealing with sciatica, your recovery strategy must be smart and safe.

    By avoiding direct pressure on your spine and instead focusing on releasing the deep hip muscles that are the root cause of the problem, you can use a foam roller to find lasting relief.

    Always listen to your body, start with a gentle tool, and perform these movements slowly.

    If your pain persists or worsens, your next step should always be to consult a qualified medical professional.

    Explore More Pain Relief Solutions

    Now that you understand the safe way to manage sciatica, explore other methods for relieving muscle tightness and improving your overall well-being.

  • How to Foam Roll for Lower Back Pain (The Safe Way)

    How to Foam Roll for Lower Back Pain (The Safe Way)

    When your lower back is aching, your first instinct might be to grab a foam roller and go to work directly on the point of pain.

    Stop.

    This is the single biggest—and most dangerous—mistake you can make.

    A comparison image showing the dangerous way to foam roll for back pain (on the lower back) versus the safe way (on the glute muscle)

    While a foam roller is a fantastic tool for alleviating back pain, you must never use it directly on your lower back.

    This guide will show you the safe, physical-therapist-approved method for relieving lower back pain by focusing on the muscles that are the real cause of your discomfort.

    For a full overview of foam rolling, start with our Ultimate Beginner’s Guide.

    The #1 Rule: Why You MUST NOT Roll Your Lower Back

    It might seem counterintuitive, but applying direct pressure to your lumbar spine is a recipe for disaster.

    Here’s why: your spine is not a single, solid block.

    Your upper-to-mid back (thoracic spine) is protected and supported by your rib cage, making it safe to roll.

    Your lower back (lumbar spine), however, is unsupported.

    This is a warning echoed by physical therapists.

    As explained in a health guide from SELF Magazine, your spine can’t handle the direct pressure in this area, which can cause the surrounding muscles to spasm in a protective effort and potentially lead to injury.

    This can cause the surrounding muscles to spasm in a protective effort, making your pain much worse and potentially leading to serious injury.

    This is, without a doubt, the most critical error to avoid, as we detail in our guide to the 7 Common Foam Rolling Mistakes (And How to Fix Them).

    The Real Culprits – The Muscles That ACTUALLY Cause Back Pain

    So, if you can’t roll your back, how do you relieve the pain?

    By understanding the concept of referred pain. In most cases, lower back pain is a symptom, not the root cause.

    The pain is the victim, not the villain.

    An anatomical diagram showing how a tight piriformis muscle can compress the sciatic nerve, which is a common cause of sciatica pain
    Lower back and leg pain is often a symptom of a tight piriformis muscle compressing the sciatic nerve

    The real culprits are the tight muscles in your lower body that connect to your pelvis and spine.

    When these muscles are tight, they pull on your pelvis, tilting it out of alignment and placing a constant strain on your lower back.

    The three main culprits are:

    1. Tight Glutes & Piriformis: Long periods of sitting can cause these powerful hip muscles to become tight and knotted, directly impacting your lower back.
    2. Tight Hip Flexors: Located at the front of your hips, these muscles get chronically shortened from sitting. This pulls your pelvis forward, creating an arch and strain in your lower back. This is the hidden connection between tight hip flexors and lower back pain.
    3. Tight Hamstrings: The muscles on the back of your thighs also attach to your pelvis. When they are tight, they pull the pelvis down, flattening your back and causing strain.

    The 4-Move Routine to Safely Relieve Lower Back Pain

    This simple routine targets the root causes of lower back pain, not the symptoms.

    Spend 1-2 minutes on each movement, focusing on slow, controlled rolls and breathing deeply.

    1. The Glute and Piriformis Roll

    A person performing the safe and effective glute and piriformis roll with a foam roller to relieve lower back pain
    Rolling the glutes and piriformis is the safest and most effective way to relieve sciatic nerve pressure

    This is your number one move for back pain.

    Releasing the glutes and the deep piriformis muscle provides immediate relief from the tension pulling on your lumbar region.

    1. Sit on the foam roller with your knees bent and feet flat on the floor.
    2. Shift your weight onto one glute and cross that same leg over the opposite knee, creating a “figure-four” shape.
    3. Use your hands for support behind you and roll slowly over the entire glute area, pausing for 20-30 seconds on any particularly tender spots.
    4. Repeat on the other side.

    2. The Hip Flexor Release

    A person safely performing a hip flexor release with a foam roller, which helps to neutralize pelvic tilt and reduce back strain
    Releasing tight hip flexors takes pressure off the lower back by helping to correct pelvic alignment

    Loosening your hip flexors allows your pelvis to return to a more neutral, relaxed position, taking pressure off your lower back.

    1. Lie face down and place the foam roller just below your hip bone on one side.
    2. Prop yourself up on your elbows and keep the other leg bent and out to the side for stability.
    3. Use very small, slow rolls to explore the area at the top of your quad.
    4. Repeat on the other side.

    3. The Hamstring Roll

     A person using a foam roller on their hamstring to reduce the pull on the pelvis and alleviate lower back pain
    Tight hamstrings can pull on the pelvis, so keeping them loose is key for a healthy back

    Releasing your hamstrings reduces the downward pull on your pelvis, which helps to alleviate strain on your lower back.

    1. Sit on the floor with the roller positioned under your upper thighs.
    2. Place your hands behind you for support and lift your hips.
    3. Slowly roll down the back of your leg, from the base of your glutes to just above the back of your knee. For more pressure, do one leg at a time.
    4. Repeat on the other side.

    4. The Upper Back Roll

    A person safely rolling their upper back to improve posture and reduce overall strain on the spine, which indirectly helps lower back pain
    Improving upper back mobility can enhance your overall posture, reducing downstream strain on your lower back

    While it doesn’t directly connect to the lower back, releasing tension in your thoracic spine improves your overall posture, which reduces downstream strain on your lumbar region.

    1. Lie on your back with the foam roller positioned under your shoulder blades.
    2. Bend your knees and cross your arms over your chest.
    3. Lift your hips and use your feet to slowly roll up and down your mid-to-upper back.

    Key Takeaways – The Safe Back Pain Protocol

    Do This (Roll These Muscles)Don’t Do This (Avoid This Area)Why it Works
    Glutes, Hips, HamstringsYour Lower Back (Lumbar Spine)You’re treating the cause, not the symptom.
    Upper Back (Thoracic Spine)Your Neck or Bony Parts of SpineImproves posture, reducing overall strain.

    Frequently Asked Questions (FAQ)

    Q: Can foam rolling make my back pain worse?
    A: Yes, if done incorrectly. Rolling directly on your lower back can significantly increase pain and inflammation. However, when you follow the safe protocol of rolling the surrounding muscles (glutes, hips, hamstrings), it is a highly effective way to relieve pain.

    Q: How often should I do this routine for back pain?
    A: For acute tightness, you can perform this routine daily. For general maintenance, 3-4 times per week is an excellent goal. Consistency is more important than intensity.

    Q: What should I do if my back pain doesn’t go away after foam rolling?
    A: A foam roller is a tool for muscle tightness, not a cure for all back pain. If your pain is sharp, radiates down your leg, or persists for more than a week, you must stop and consult a doctor or physical therapist to rule out a more serious underlying condition.

    Conclusion – Treat the Cause, Not the Symptom

    The key to relieving lower back pain with a foam roller is to shift your focus.

    Instead of attacking the site of the pain, you now have a safe and effective plan to treat the root causes of the problem.

    By consistently releasing the tension in your glutes, hips, and hamstrings, you allow your pelvis and spine to return to a neutral, pain-free state.

    To see these safe techniques demonstrated by a medical professional, watch this excellent guide from a certified physical therapist:

    This proactive approach is not just a temporary fix; it’s a long-term strategy for better movement and a healthier back.

    Your Next Step in Building a Resilient Body

    You’ve learned how to safely manage one of the most common aches and pains.

    Now, consider exploring other ways to build a stronger, more resilient body from the comfort of your home.