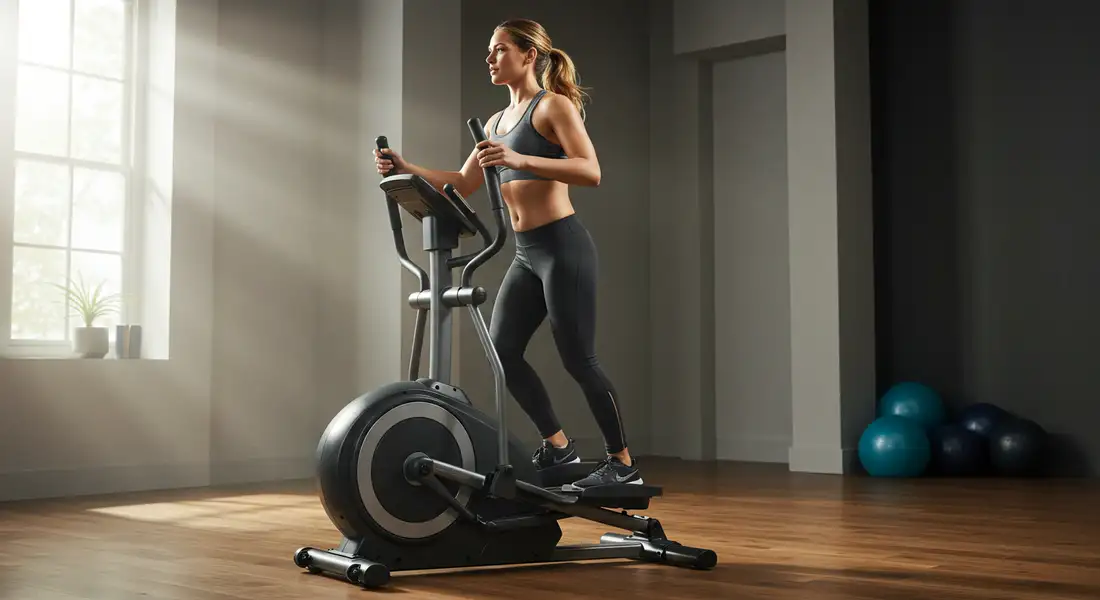
You’ve seen them at the gym, maybe even used one – folks on the elliptical, some gliding effortlessly, looking strong and focused, while others… well, they might look a bit uncomfortable, hunched over, or simply “going through the motions.”
What’s the difference?
Often, it boils down to one crucial, yet frequently overlooked, element: proper elliptical form.
It’s easy to think that using an elliptical is as simple as stepping on and moving your feet.
But just like any exercise, how you perform the movement matters immensely.
Incorrect form not only limits the effectiveness of your workout – meaning fewer calories burned and less muscle engagement – but it can also pave the way for nagging pains in your knees, back, or shoulders, or even lead to injury.
But don’t worry!
This isn’t just another list of “don’ts.” This ultimate guide is about empowering you to master proper elliptical form.
We’ll break down everything from setting yourself up correctly before you start, to optimizing your movement during the workout, and even how to self-correct common mistakes.
Get ready to transform your elliptical session from a mindless chore into a targeted, effective, and, most importantly, safe workout that truly unlocks your machine’s potential.
Phase 1 – Setting the Stage – Pre-Workout Form Foundations
Great elliptical form begins before you even take your first vigorous stride. These initial steps ensure safety and set you up for a comfortable, effective session.
The “Mount & Dismount” Ritual – Safety First, Always
It might seem basic, but approaching and getting on and off any exercise machine, especially one that moves, requires a moment of care.
- Mounting: Always grasp the static (non-moving) handlebars for stability first. Step onto the pedal that is closest to you or in the lowest position. Once that foot is secure, bring your other foot onto the opposite pedal. Get your balance before you start moving.
- Dismounting: Similarly, bring the machine to a complete stop. Hold the static handlebars, then carefully step off one foot at a time.
Why it matters: This simple routine prevents slips, stumbles, or losing balance, which is especially important for beginners or if you’re using an unfamiliar machine.
Your Base of Support – Perfecting Foot Placement
Where you place your feet on those oversized elliptical pedals can significantly impact comfort and effectiveness.
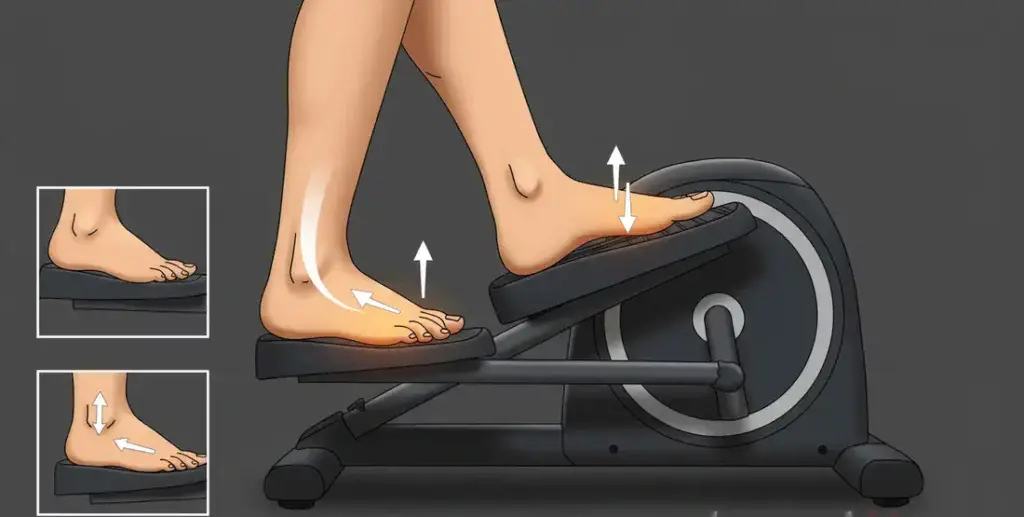
- Find the “Sweet Spot”: Aim to place the center of your foot comfortably on the pedal. Your entire foot should feel supported.
- Common Pitfalls & Fixes:
- Too Far Forward (On Your Toes): This is a frequent mistake that can lead to numb toes (“tingly toe syndrome”), calf strain, or shin splints. The Fix: Consciously shift your weight back slightly so more pressure is through your midfoot and heel.
- Too Far Back (Mainly on Heels): This can make you feel unstable and may reduce your power output. The Fix: Shift your foot slightly forward to distribute pressure more evenly.
- The Goal: Maintain relatively flat, stable contact with the pedal throughout most of the motion. A slight, natural lift of the heel as the pedal moves to the back of the ellipse is normal for many, but avoid actively pushing off your toes or letting your heels lift excessively.
The Pre-Flight Check – Quick Machine Familiarization (Brief)
If it’s your first time on a specific elliptical, take a second to note where the emergency stop button is (if it has one) and how to adjust the basic resistance.
You can dive deeper into all the bells and whistles in our guide to Essential Elliptical Features.
Phase 2 – Mastering the Motion – Your Form During the Workout
This is where the magic happens. Nailing these elements will make your workout more efficient and safer.
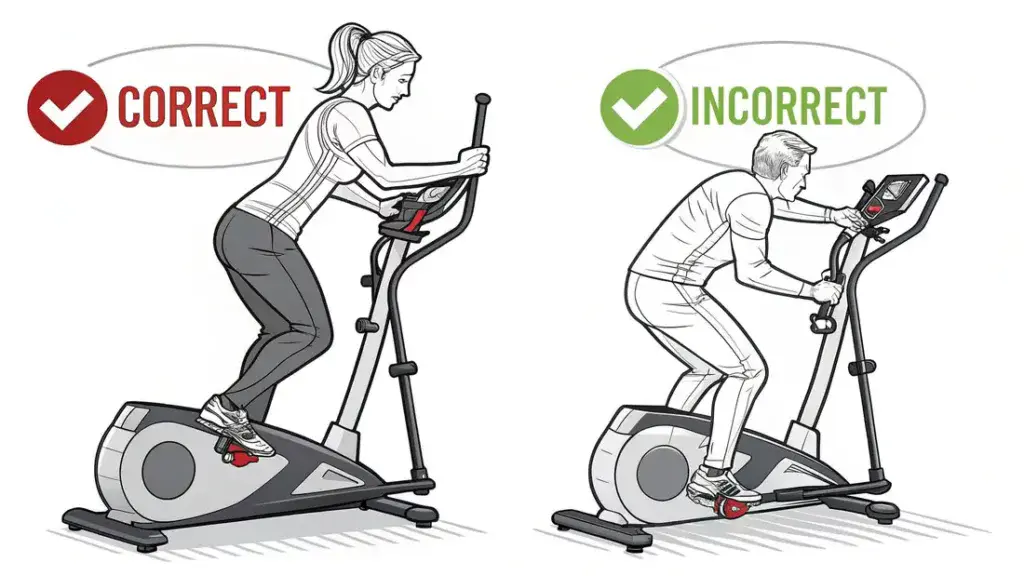
The Posture Powerhouse – Your Core & Upper Body Alignment
Your posture is the cornerstone of good elliptical form.
- Stand Tall, Look Forward: Imagine a string gently pulling you up from the crown of your head towards the ceiling. Your spine should be in a neutral position – not overly arched or rounded.
- Shoulders Relaxed & Down: Actively draw your shoulder blades down and slightly back, away from your ears. Avoid hunching or shrugging.
- Engage Your Core (Subtly): This doesn’t mean sucking in your stomach hard. Think of gently bracing your abdominal muscles, as if you’re about to be lightly poked in the tummy. This provides crucial support for your lower back and helps stabilize your torso. A strong core is key for many exercises.
- Head & Neck Position: Keep your gaze forward naturally. Looking down at your feet can strain your neck and encourage slouching. Looking too far up can also cause discomfort.
- Form Fixer – Common Mistake 1: The “Elliptical Sloucher.”
- The Look: Rounded shoulders, head jutting forward, collapsed chest.
- The Feel: Potential neck/back pain, less effective breathing.
- The Visual Cue Fix: Imagine you’re wearing a superhero cape – chest out (proudly!), shoulders back. Look straight ahead.
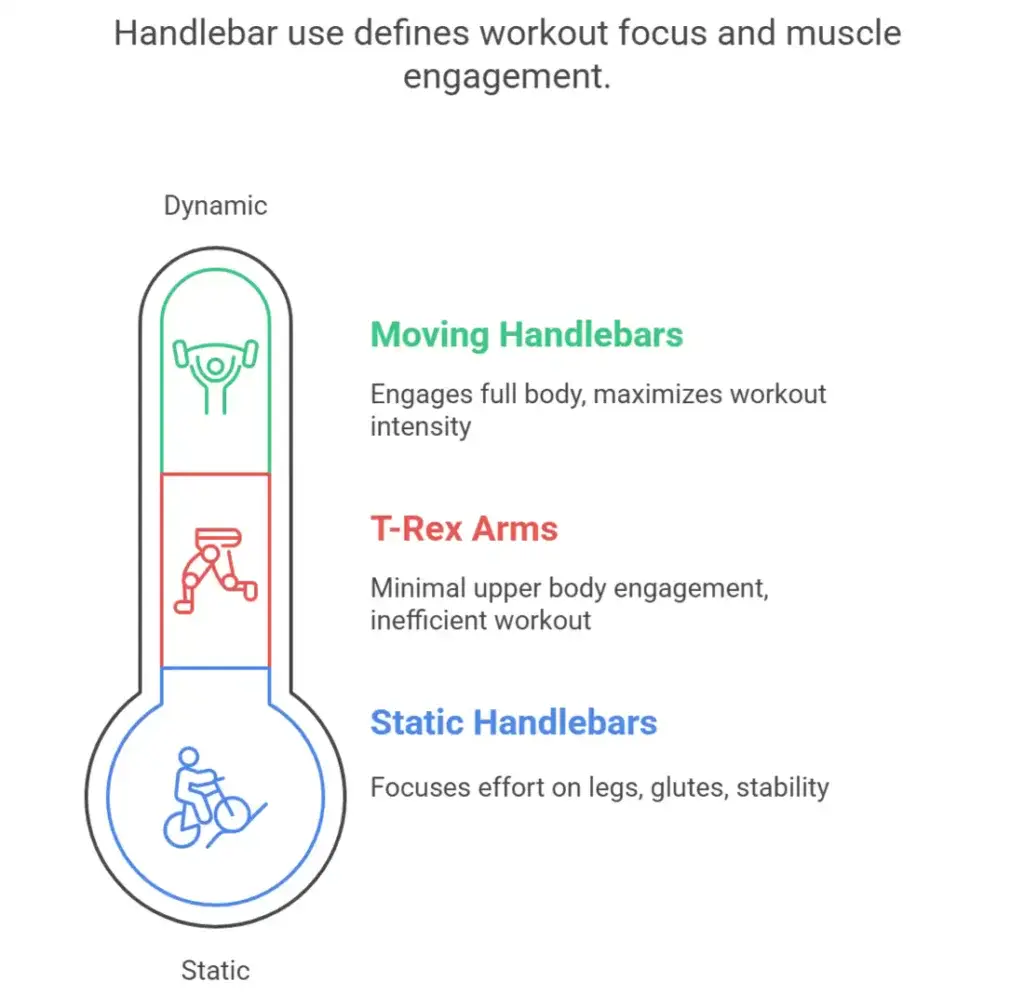
The Arm Action Advantage – Using Handlebars Effectively (Or Not)
How you use (or don’t use) the handlebars dramatically changes the workout.
- Moving Handlebars (If Using for a Full-Body Workout):
- The Push-Pull Principle: This is key! Don’t just let your arms go along for the ride. Actively push one handle forward as you pull the other one back. This engages your chest, back, shoulders, biceps, and triceps.
- Grip: Maintain a light but firm grip. A “death grip” will transfer tension up into your shoulders and neck.
- Elbows: Keep a slight, natural bend in your elbows throughout the movement. Avoid locking them out straight.
- Rhythm & Coordination: Your arm movement should be synchronized with your leg movement, typically in an opposite arm/leg pattern (e.g., right arm moves forward as your left leg moves forward).
- Form Fixer – Common Mistake 2: “T-Rex Arms” or “Zombie Arms.”
- The Look: Elbows pinned tightly to the sides with minimal movement (“T-Rex”), or arms moving passively, limp and disengaged (“Zombie”).
- The Feel: Little upper body engagement, workout feels easier than it should.
- The Visual Cue Fix: Think of the powerful arm motion in cross-country skiing or a brisk, purposeful march. Engage those muscles!
- Static Handlebars (If Preferring to Focus on Lower Body):
- Purpose: Holding the stationary handles allows you to focus all your effort on your legs and glutes, or provides extra stability, or a place to rest your hands while checking your heart rate.
- Maintain Posture! Crucially, even when using static handles, do not lean heavily on them or allow your good upper body posture to collapse. Keep your core engaged and shoulders relaxed. Use a light grip.
The Leg & Hip Harmony – Smooth, Controlled Movement
Let’s get those legs gliding efficiently.
- The Motion: Aim for a smooth, continuous, oval-shaped motion. Think “gliding” or “floating” rather than “stomping” or “chopping.” The movement should come from your hips, not just your knees.
- Knees: Maintain a slight bend in your knees throughout the entire revolution of the pedals. Never lock your knees out straight, especially as the pedal moves forward. Your knees should generally track in line with your second toe – avoid letting them cave inwards or bow outwards excessively.
- Hips: Try to minimize excessive side-to-side swaying or rocking of your hips. A little natural movement is fine, but your engaged core should help keep your hips relatively stable and facing forward.
- Form Fixer – Common Mistake 3: The “Bouncy Rider” or “Knee Locker.”
- The Look: Too much up-and-down bouncing with each stride, or knees snapping straight at the front of the motion.
- The Feel: Inefficient, potential knee strain.
- The Visual Cue Fix: Imagine you’re trying to keep a glass of water balanced on your head – aim for smooth, level movement. Think “soft knees.”

The Resistance Factor – Don’t Sacrifice Form for Intensity
This is a golden rule for any exercise: Only increase resistance or speed if you can maintain good form.
If you find yourself slouching, jerking, or using momentum to cheat just to handle a higher setting, you’re doing yourself a disservice.
Dial back the intensity until your proper elliptical form is solid, then gradually increase it again.
Phase 3 – The Fine-Tuning & Self-Correction Loop
Becoming proficient in proper elliptical form is an ongoing process. Learn to be your own form coach.
Listen to Your Body – The Ultimate Form Feedback
Your body provides constant feedback. Pay attention to it!
- Pain is a Red Flag: Sharp, stabbing, or persistent pain is never normal during exercise. Stop, assess your form, and if it continues, consult a professional.
- Numbness or Tingling: Especially in the feet (“pins and needles”), this often points to incorrect foot placement on the pedals or shoes that are laced too tightly.
- Excessive Soreness in Unexpected Places: If your lower back or shoulders are consistently screaming after elliptical workouts (and not in a good “worked muscle” way), your form likely needs adjustment.
The Mirror Check (If Possible) – Your Visual Coach
If your gym has mirrors, or if you can position your home elliptical near one, use it!
Seeing your reflection is one of the quickest ways to spot postural issues like slouching or excessive hip swaying.
Common “Feel Cues” for Good Form
When your form is on point, you should generally feel:
- Balanced and Stable: Not wobbly or struggling to keep control.
- Smooth and Controlled: Movements are fluid, not jerky.
- Core Gently Engaged: A sense of stability around your midsection.
- Effort Distributed: If using moving handles, you should feel your upper body contributing, not just your legs.
Troubleshooting Common Elliptical Discomforts (Connecting to Form Fixes)
- Knee Pain? Check for: Locked knees at extension, feet too far forward/back, knees caving inwards, too much resistance too soon.
- Lower Back Ache? Check for: Slouching, excessive arching of the back, weak core engagement allowing hips to sway too much.
- Numb Feet/Toes? Check for: Foot placement too far forward, shoes too tight, prolonged pressure on the balls of the feet.
- Shoulder/Neck Strain? Check for: Death grip on handles, hunching shoulders towards ears, looking down excessively.
Bonus Tip – Adjusting Form for Specific Goals (Briefly)
Once your foundational proper elliptical form is solid, you can make subtle tweaks:
- Targeting Glutes & Hamstrings More: Try leaning back very slightly from your hips (maintaining a straight spine, don’t round your back!), consciously push more through your heels, and utilize the incline feature if your machine has one.
- Targeting Quads More: Maintain a more upright posture and you might focus slightly more on the “forward push” phase of the pedal stroke.
Disclaimer: These are subtle shifts. Don’t compromise the core principles of good posture and movement for them.
Conclusion – Good Form Unlocks Great Results & Lasting Health
Mastering proper elliptical form isn’t about achieving aesthetic perfection; it’s about transforming your workout into a highly effective, injury-preventing, and enjoyable experience.
It’s the key to unlocking better muscle engagement, maximizing your calorie burn, and ensuring you can keep gliding towards your fitness goals for the long haul.
Remember, developing good form is an ongoing process of awareness, practice, and adjustment.
Be patient with yourself, listen to your body, and use the tips in this guide to continuously refine your technique.
The effort you put into your form will pay dividends in your results and your overall well-being.
Ready to put this knowledge into action?
Now that your form is solid, explore some Effective Elliptical Workouts for Beginners.
Need a refresher on your machine’s setup or features? Visit our comprehensive Beginner’s Guide to Ellipticals.
What’s the biggest form challenge you face on the elliptical, or what’s one tip that has really helped you?