So, you’ve chosen your rowing machine, and you’re eager to start reaping those incredible full-body benefits.
Fantastic!
But before you aim for speed or distance, there’s one crucial element that underpins every effective and injury-free rowing session: proper technique.
Mastering the basic rowing stroke might seem daunting at first, with its distinct phases and coordinated movements, but trust us – it’s the key to unlocking the true power and enjoyment of rowing.
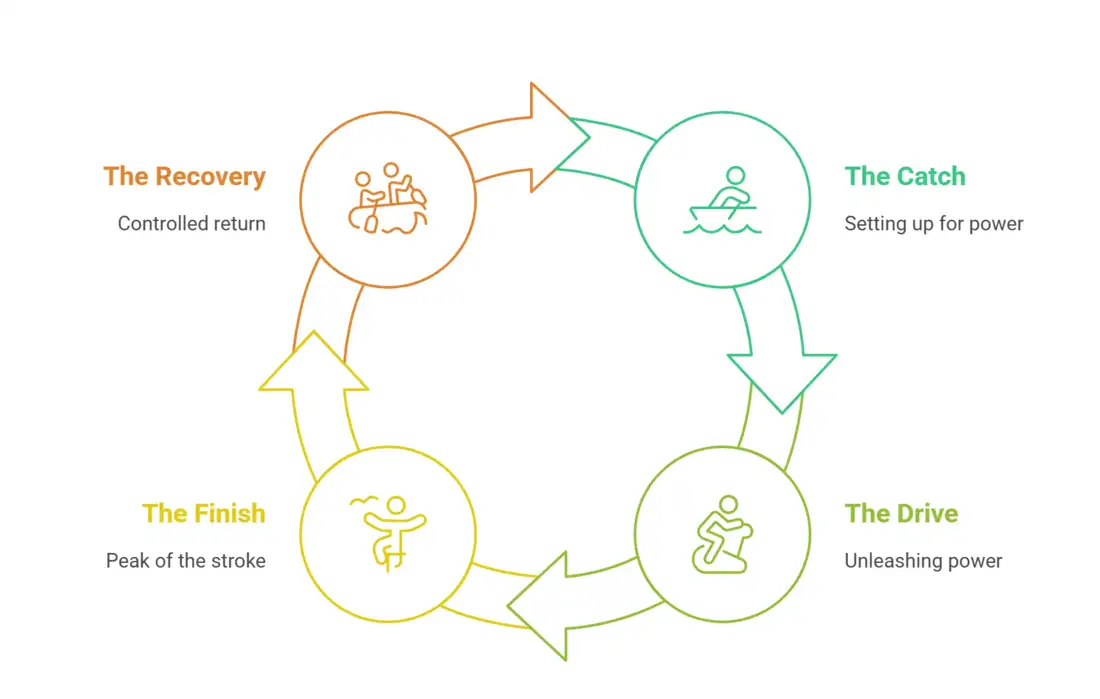
This in-depth guide will break down the rowing stroke into its four fundamental phases: The Catch, The Drive, The Finish, and The Recovery.
We won’t just tell you what to do; we’ll also highlight common difficulties beginners face in each phase and provide practical tips to overcome them.
Our goal is to help you move from feeling awkward to gliding with confidence and efficiency.
Remember, good habits built now will serve you for your entire rowing journey.
Why Proper Rowing Technique is Non-Negotiable
Before we dive into the “how,” let’s briefly touch on the “why.” Focusing on good form from day one:
- Maximizes Workout Effectiveness: Ensures you’re engaging the right muscles (over 86% of them!) for a true full-body workout.
- Prevents Injuries: Incorrect form, especially involving the back, can lead to strains and discomfort. Good technique protects your joints and spine.
- Increases Efficiency: You’ll generate more power with less wasted effort, allowing you to row longer and stronger.
- Makes Rowing More Enjoyable: A smooth, rhythmic stroke feels good!
The Golden Rule of Rowing – Legs – Core – Arms, then Arms – Core – Legs
Burn this sequence into your brain! It dictates the order of operations for power and return:
- On the Drive (Power): 1. Legs push, 2. Core swings back, 3. Arms pull.
- On the Recovery (Return): 1. Arms extend, 2. Core hinges forward, 3. Legs bend.
Think of it as an orchestra – each section plays its part in perfect timing.
Phase 1 – The Catch – Setting Up for Power

The Catch is the very start of your stroke, where you “catch” the water (or the resistance).
It’s all about loading up for a powerful drive.
Correct Catch Position
- Shins Vertical: Your shins should be perpendicular to the floor (or as close as your flexibility allows). Your seat will be close to your heels.
- Forward Lean from Hips: Lean your torso forward from your hips, aiming for about a “1 o’clock” body angle if a clock face were in front of you. Your shoulders should be in front of your hips.
- Straight Back, Proud Chest: Maintain a strong, straight spine. Avoid slouching or rounding your lower back. Think “chest up.”
- Arms Straight & Relaxed: Arms are extended forward, holding the handle with a light but secure grip. Knuckles should face up.
- Core Engaged: Your abdominal muscles should be braced to support your spine.
- Shoulders Relaxed: Don’t hunch your shoulders up towards your ears.
Common Difficulties & How to Overcome Them (The Catch)
- Difficulty: Rounding the Lower Back (Slouching)
- Why it’s bad: Puts immense strain on your lumbar spine.
- Overcome it: Actively think “chest proud” or “sit tall.” Engage your core. Practice hinging from your hips, not your waist. Imagine a steel rod running along your spine. If flexibility is an issue, work on hamstring and hip flexor stretches off the rower.
- Difficulty: Overreaching (Leaning Too Far Forward / Shins Past Vertical)
- Why it’s bad: Puts you in a weak, compressed position and can strain the back. Doesn’t add effective stroke length.
- Overcome it: Focus on the shins-vertical cue. Use a mirror to check your position. Don’t try to get “extra” length by compromising your posture.
- Difficulty: Bending Arms Too Early
- Why it’s bad: You want your strong legs to initiate the drive, not your weaker arms.
- Overcome it: Keep a light grip. Consciously think “arms are just ropes” at this stage, connecting your body to the handle.
- Difficulty: Tense Shoulders / Death Grip on Handle
- Why it’s bad: Wastes energy and can lead to neck/shoulder pain.
- Overcome it: Actively relax your shoulders away from your ears. Loosen your grip – hold the handle primarily with your fingers.
Phase 2 – The Drive – Unleashing the Power
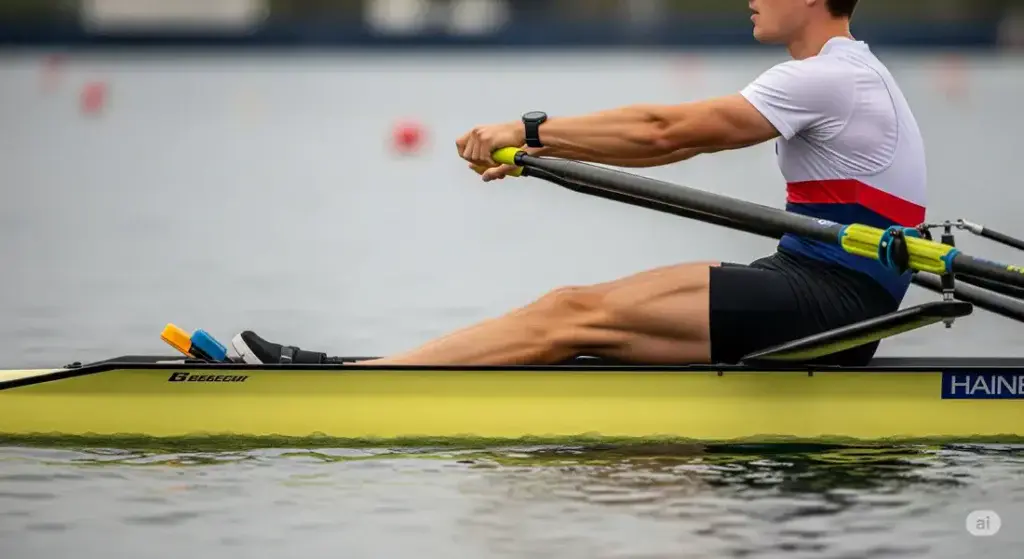
The Drive is where you generate all your power. It’s an explosive yet controlled movement, driven primarily by your legs.
Correct Drive Execution (Legs -> Core -> Arms)
- Legs PUSH (60% of power): Initiate the movement by powerfully pushing with your legs, as if doing a leg press. Your body angle (the 1 o’clock forward lean) should initially remain the same as your shoulders and hips move back together.
- Core Swings Back (20% of power): As your legs approach full extension, begin to swing your torso back from the hips. Your body will move from the 1 o’clock position to around an 11 o’clock position (a slight backward lean). Keep your core engaged to transfer power.
- Arms Pull (20% of power): Only after your legs are nearly straight and your core has begun its swing, do you pull the handle smoothly and horizontally towards your lower chest/upper abdomen. Draw your elbows back past your body.
Common Difficulties & How to Overcome Them (The Drive)
- Difficulty: “Shooting the Slide” (Butt moves back, shoulders stay put)
- Why it’s bad: Disconnects leg power from the stroke; the back has to do all the work to catch up, risking injury.
- Overcome it: Focus on pushing the foot stretchers away with your legs while keeping your core connected. Imagine your shoulders and hips are linked and move back together initially. Practice “legs only” rowing (no arm pull, no body swing) to feel this connection.
- Difficulty: Opening the Back Too Early (Leaning back before legs are done)
- Why it’s bad: Loses leg power and puts strain on the lower back.
- Overcome it: Keep your core braced and maintain that initial forward lean until your legs have done most of their work. Think “legs first, then swing.”
- Difficulty: Pulling with Arms First / Bending Arms Too Soon
- Why it’s bad: Your arms are much weaker than your legs. This robs you of power and tires your arms quickly.
- Overcome it: Keep arms straight and relaxed like ropes during the initial leg drive. The arm pull is the last part of the power sequence.
- Difficulty: “Chicken Winging” (Elbows flaring out wide)
- Why it’s bad: Inefficient and can strain shoulders.
- Overcome it: Keep your elbows relatively close to your body as you pull the handle back. Think of drawing them straight back past your ribs.
Phase 3 – The Finish – The Peak of the Stroke
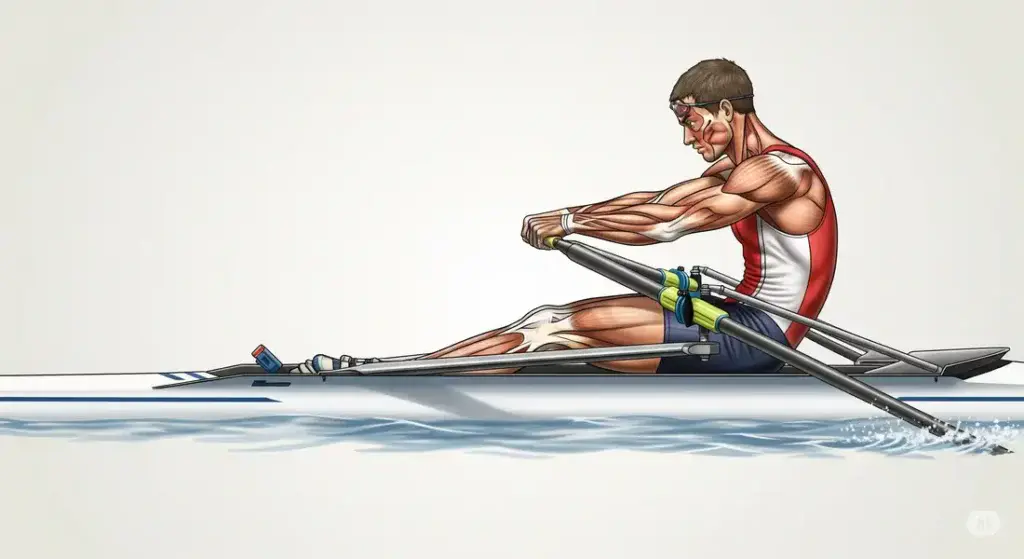
The Finish is the brief moment at the end of the Drive where all your power has been applied.
Correct Finish Position
- Legs Extended: Legs are fully extended but knees are not locked (soft knees).
- Slight Backward Lean: Torso is leaning back slightly from the hips (around that 11 o’clock position). Core remains engaged.
- Handle at Lower Chest/Upper Abdomen: Handle is pulled in smoothly to just below your sternum.
- Elbows Drawn Back: Elbows are behind your torso, pointing somewhat downwards and back.
- Shoulders Low & Relaxed: Avoid hunching.
- Wrists Flat: Keep wrists in a neutral position, not bent up or down.
Common Difficulties & How to Overcome Them (The Finish)
- Difficulty: Leaning Back Too Far
- Why it’s bad: Puts excessive strain on the lower back and makes the recovery awkward.
- Overcome it: Aim for that controlled 11 o’clock lean. Engage your core to prevent over-leaning. Use a mirror if possible.
- Difficulty: Pulling Handle Too High (to neck/chin) or Too Low (to stomach)
- Why it’s bad: Inefficient and can strain shoulders or impede breathing.
- Overcome it: Aim for a consistent pull to the lower part of your chest or upper abdomen, just below the ribcage.
- Difficulty: Hunching Shoulders / Tensing Neck
- Why it’s bad: Wastes energy and can lead to discomfort.
- Overcome it: Actively keep your shoulders down and relaxed. Focus on using your back muscles (lats) for the pull, not just your arms and shoulders.
Phase 4 – The Recovery – Controlled Return to the Catch
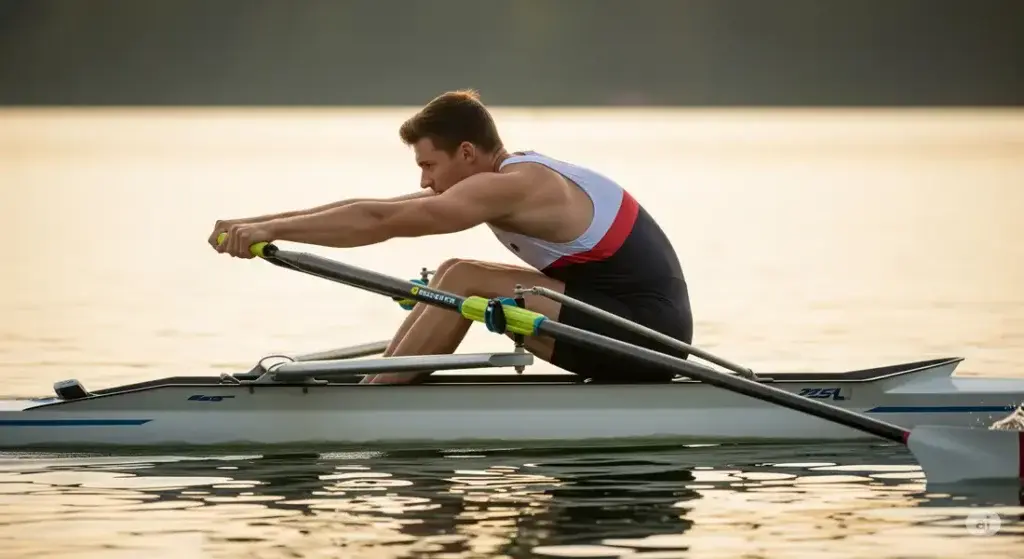
The Recovery is just as important as the Drive.
It’s about returning to the Catch position smoothly and efficiently, preparing for the next stroke.
It should generally take about twice as long as the Drive.
Correct Recovery Execution (Arms -> Core -> Legs)
- Arms Extend FIRST: Immediately after the Finish, extend your arms forward until they are straight.
- Core Hinges Forward: Once your arms are straight, hinge your torso forward from your hips, maintaining a straight back, moving from the 11 o’clock position back towards the 1 o’clock Catch position.
- Legs Bend LAST: Only after your hands have passed your knees, allow your knees to bend and smoothly slide your seat forward on the rail, returning to the Catch position.
Common Difficulties & How to Overcome Them (The Recovery)
- Difficulty: Bending Knees Too Early (Before Arms Extend / Handle Passes Knees)
- Why it’s bad: This is a classic beginner mistake! Your hands will get stuck behind your knees, forcing you to lift the handle up and over, creating a jerky, inefficient motion.
- Overcome it: Drill the “Arms -> Core -> Legs” sequence relentlessly. Consciously extend your arms fully first. Then pivot your body forward. Only then do your knees bend. Exaggerate the pause after extending your arms if needed.
- Difficulty: Rushing the Recovery
- Why it’s bad: Doesn’t give you time to prepare for the next Catch, can disrupt rhythm, and makes the workout feel frantic. The recovery is your “rest” phase.
- Overcome it: Focus on a controlled, smooth slide forward. Count if it helps: “One (Drive), two-three (Recovery).”
- Difficulty: Slumping/Rounding Back on the Way Forward
- Why it’s bad: Same reasons as at the Catch – back strain.
- Overcome it: Maintain that “proud chest” and straight back as you hinge forward from the hips. Keep your core engaged.
Breathing – The Unsung Hero of Good Technique
- Exhale: During the Drive (effort phase). A common pattern is to start exhaling as you initiate the leg drive and finish the exhale as you pull the handle to your chest.
- Inhale: During the Recovery (return phase).
Consistent breathing helps with rhythm and oxygen delivery.
Drills for Technique Perfection
Practice these drills slowly, focusing on form
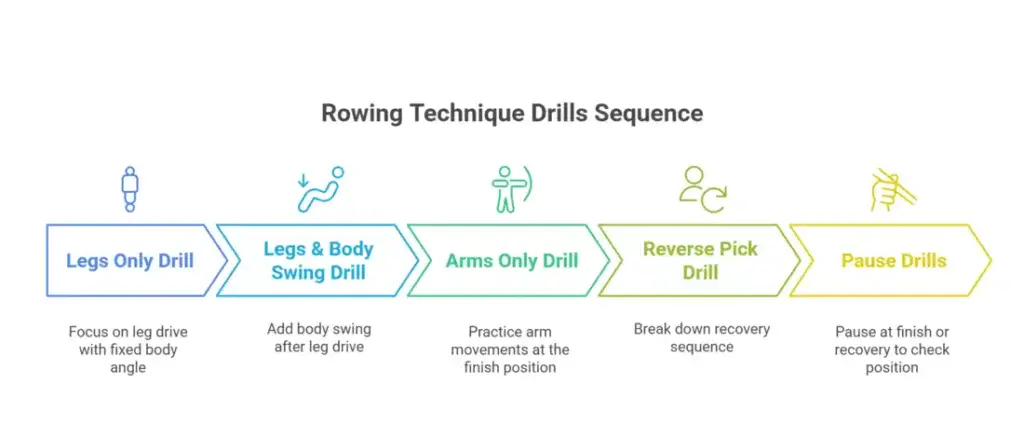
- Legs Only: Arms straight, body angle fixed. Just push with legs and recover.
- Legs & Body Swing: Add the body swing after the leg drive. Arms remain straight.
- Arms Only: Sitting at the Finish position, extend and pull arms, keeping legs straight and body still.
- Reverse Pick Drill: Start with Arms Only, then add Body Swing & Arms, then full slide (Catch, Drive, Finish, Recovery). This breaks down the recovery sequence.
- Pause Drills: Pause briefly at the Finish, or after arms extend on the Recovery, to check your position.
Final Tips for Mastering Your Stroke
- Start Slow: Speed and power come after good form is established.
- Use a Mirror: Set up a mirror to your side if possible, or film yourself. Visual feedback is invaluable.
- Listen to Your Body: If something feels painful (not just muscle fatigue), stop and reassess your form.
- Be Patient: Developing good rowing technique takes time and conscious effort. Don’t get discouraged!
- Consider a Few Sessions with a Coach: If available, even one or two sessions with a qualified rowing instructor can provide personalized feedback that accelerates your learning. Many resources like U.S. Rowing offer coaching directories or online resources.
FAQs – Rowing Technique Clarified
- Q1: How long does it typically take a beginner to learn good rowing form?
- A: It varies greatly, but with consistent, mindful practice (2-3 times a week), most beginners can get a good grasp of the basic sequence and correct major errors within 2-4 weeks. Truly mastering the nuances for optimal efficiency can be an ongoing process, but a solid foundation can be built relatively quickly by focusing on the key phases.
- Q2: My lower back hurts when I row. What am I likely doing wrong?
- A: Lower back pain is often a sign of incorrect technique. Common culprits include:
- Rounding your back at the Catch or during the Drive.
- “Shooting the slide” (butt moves before shoulders), forcing your back to do the work.
- Opening your back (leaning back) too early in the Drive before your legs have finished pushing.
- Overreaching at the Catch or leaning back too far at the Finish.
Focus on maintaining a straight, supported spine, hinging from the hips, and ensuring your legs initiate the Drive. If pain persists, stop and consult a fitness professional or doctor.
- A: Lower back pain is often a sign of incorrect technique. Common culprits include:
- Q3: Should I use a high damper setting/resistance when learning technique?
- A: No, it’s generally recommended to use a lower damper setting (on air rowers, typically 3-5) or lower resistance level when first learning. This allows you to focus on the coordination and sequence of the movement without battling heavy resistance, which can encourage bad habits. Once your technique is solid, you can gradually increase the challenge.
Conclusion – Technique is Your Ticket to Rowing Success
Mastering the Catch, Drive, Finish, and Recovery is not just about looking good on the rower; it’s about unlocking a safer, more powerful, and ultimately more rewarding workout experience.
By understanding the mechanics, being aware of common pitfalls, and diligently practicing the corrective cues, you’ll transform your rowing from a series of disjointed movements into a fluid, efficient, and enjoyable rhythm.
This investment in learning proper rowing machine technique will pay dividends in your fitness journey, helping you achieve your goals and enjoy every glide.
What’s the trickiest part of the rowing stroke for you?
- Do you have any technique tips that have helped you?
Share your experiences and questions in the comments below!
Next Steps:
- Feeling confident? Try some Simple Rowing Workouts for Beginners.
- Need a refresher on your machine? See our guide to Key Rower Features.
- Go back to the main Beginners Guide to Rowing Machines for a full overview.
