Ever feel like your workouts are stuck in a rut? Or maybe you’re searching for that elusive exercise that’s kind to your joints but ruthless on calories?
If you’re nodding along, then let me introduce you to your potential new best friend: the rowing machine.
I remember my first encounter – I was intimidated, thinking it was only for elite athletes. Boy, was I wrong!
This powerhouse piece of equipment is surprisingly beginner-friendly and offers a full-body workout like no other.
This Beginners Guide to Rowing Machines is designed to demystify the rower, break down the essentials, and get you gliding towards your fitness goals with confidence.
We’ll cover everything from the incredible benefits and different types of machines to nailing your technique, trying your first workouts, and sidestepping common pitfalls.
Ready to transform your home fitness routine? Let’s dive in!
Why Row? The Surprising Benefits for Beginners
Before we get into the nuts and bolts, let’s talk about why a rowing machine deserves a prime spot in your home gym.
It’s not just about burning calories; it’s about a holistic approach to fitness.
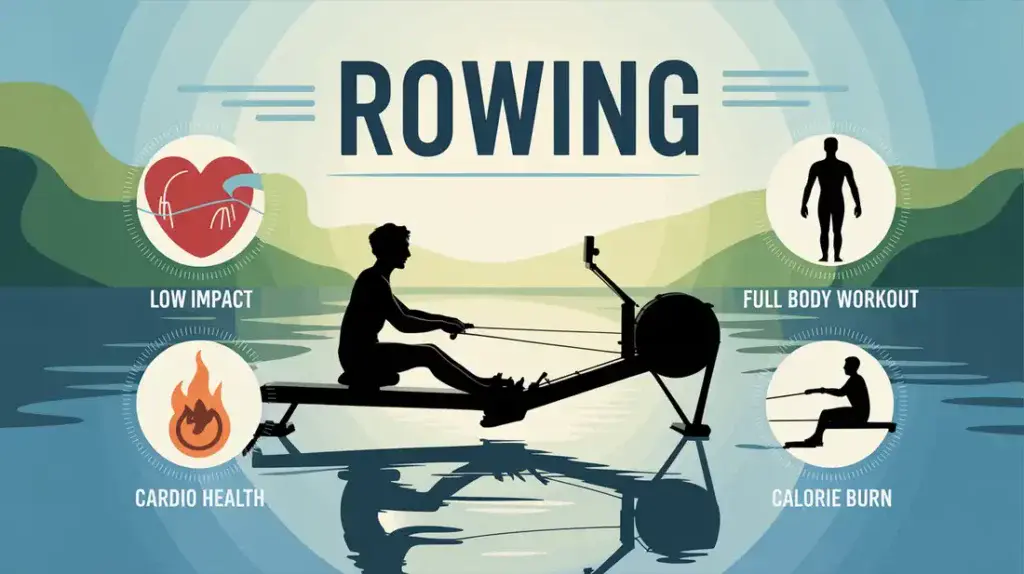
- Low-Impact, High Reward: This is a game-changer. Rowing is incredibly gentle on your joints (ankles, knees, hips) because your feet remain connected to the footplates and your movement is fluid. This means less jarring and a lower risk of impact-related injuries compared to activities like running.
- Full-Body Fiesta (Seriously!): Forget isolating muscle groups. Rowing engages an incredible 86% of your body’s muscles with every single stroke! We’re talking legs (quads, hamstrings, glutes), core (abs, obliques, lower back), and upper body (back, shoulders, arms).
- Cardio Champion: Get ready to boost your heart health! Rowing elevates your heart rate effectively, strengthening your cardiovascular system, improving circulation, and building serious endurance.
- Calorie Torcher: Because it uses so many muscles, rowing is a phenomenal calorie burner. Depending on intensity and your body weight, you can expect to burn anywhere from 400 to 800+ calories per hour.
- Strength and Endurance Builder: It’s not just cardio; it’s resistance training too. You’re working against the machine’s resistance, building lean muscle and improving muscular endurance simultaneously.
- Posture Perfecter: When done correctly, rowing strengthens your core and back muscles, which can significantly improve your posture. Bye-bye, desk slouch!
- Stress Buster: The rhythmic, gliding motion of rowing can be incredibly meditative. It’s a fantastic way to clear your head and release stress.
If you’re looking for a deep dive, check out our article on The Full-Body Benefits of Rowing for Beginners.
Decoding the Rower – Types of Rowing Machines Explained
Not all rowers are born equal.
The primary difference lies in their resistance mechanism, which impacts the feel, noise, size, and price.
Let’s break down the main contenders:
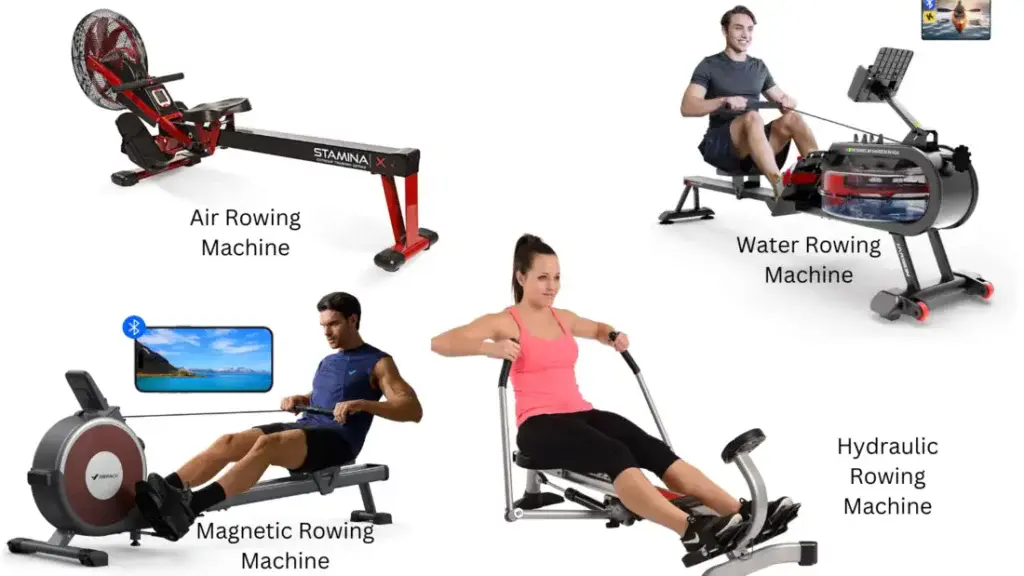
Air Rowers (Fan-Flywheel)
- How it Works: A flywheel with fan blades spins against air resistance. The harder you pull, the faster the fan spins, and the more resistance you create.
- Pros: Smooth, responsive resistance that matches your effort; favored by competitive rowers; great for HIIT.
- Cons: Can be noisy (that “whoosh” sound); resistance is self-regulated (which can be a pro for some!).
- Best For: Those who want a gym-standard experience, like dynamic resistance, and don’t mind the noise.
Magnetic Rowers
- How it Works: Magnets move closer to or further from a metal flywheel to create resistance, usually adjusted via a dial or console.
- Pros: Very quiet operation (apartment-friendly!); smooth, consistent resistance; often have defined levels.
- Cons: Resistance might feel less “natural” than air or water; top-end resistance might be lower than premium air rowers.
- Best For: Home users prioritizing silence and easily adjustable, predictable resistance levels.
Water Rowers
- How it Works: Paddles spin in a tank of water. Like air rowers, resistance increases with your effort, creating a feel that closely mimics on-water rowing.
- Pros: Very smooth and consistent; soothing “swoosh” sound; often aesthetically pleasing (many are wooden).
- Cons: Can be heavier and bulkier; water needs occasional treatment; often pricier.
- Best For: Those seeking the most realistic rowing feel, appreciate design, and enjoy the sound of water.
Hydraulic Piston Rowers
- How it Works: Hydraulic cylinders attached to the handles provide resistance.
- Pros: Usually the most compact and affordable.
- Cons: Motion can feel less natural; arms often move in fixed arcs, not a straight pull; resistance might fade with heat or wear.
- Best For: Beginners on a very tight budget with extremely limited space, or those just testing the waters (pun intended!).
Still unsure?
Our detailed guide on Types of Rowing Machines can help you choose.
Quick Comparison Table – Rowing Machine Types
| Feature | Air Rower | Magnetic Rower | Water Rower | Hydraulic Rower |
| Resistance | Variable, by effort | Adjustable levels | Variable, by effort | Adjustable levels |
| Noise Level | Loud | Quiet | Moderate (Swoosh) | Quiet to Moderate |
| Feel | Smooth, responsive | Smooth, consistent | Realistic, smooth | Can be less fluid |
| Maintenance | Low (clean fan) | Very Low | Water treatment | Piston wear |
| Price Range | Mid to High | Low to Mid | Mid to High | Low |
| Footprint | Medium to Large | Medium | Medium to Large | Small |
Essential Features – What Beginners REALLY Need in a Rower
Okay, you’ve got a type in mind. Now, what specific features should you look for?
- The Monitor/Console: This is your command center. For beginners, clarity is king. Look for:
- Essential Metrics: Time, Distance (meters), Strokes Per Minute (SPM), and Split Time (e.g., /500m – a standard rowing pace metric). A calorie estimate is a good motivator too.
- Readability: Big, clear numbers! A backlit screen is a bonus for dim rooms.
- My two cents: Don’t get bogged down with a million fancy programs at first. A reliable monitor like the Concept2 PM5 is a gold standard for a reason: it’s accurate and shows what matters. Many good beginner machines offer simpler but effective consoles.
- Resistance System & Levels: Ensure it’s easy to adjust (if applicable) and offers a range suitable for a beginner to progress. Smoothness is non-negotiable.
- Comfort is Key: If it’s not comfy, you won’t use it. Check:
- Seat: Padded and ergonomically shaped.
- Handle: Comfortable grip, appropriate width.
- Footrests: Adjustable, secure straps, and ideally a little flex.
- Rail Length: Crucial if you’re tall – ensure full leg extension.
- Build Quality & Stability: It should feel solid, not wobbly, and have a decent maximum user weight capacity.
- Size & Storage: Measure your space! Many rowers fold or store upright. Look for transport wheels.
For a more granular look, explore our Key Rower Features to Look For.
Nailing the Technique – The 4 Phases of a Perfect Stroke
This is where the magic happens. Proper technique is VITAL for effectiveness and injury prevention.
The rowing stroke is a beautiful sequence: Legs -> Core -> Arms, then Arms -> Core -> Legs on the return.
(1) The Catch (Start Position)
- Shins vertical, lean forward from hips (straight back, chest proud – think “1 o’clock” body angle).
- Arms straight, shoulders relaxed and in front of hips. Core engaged.
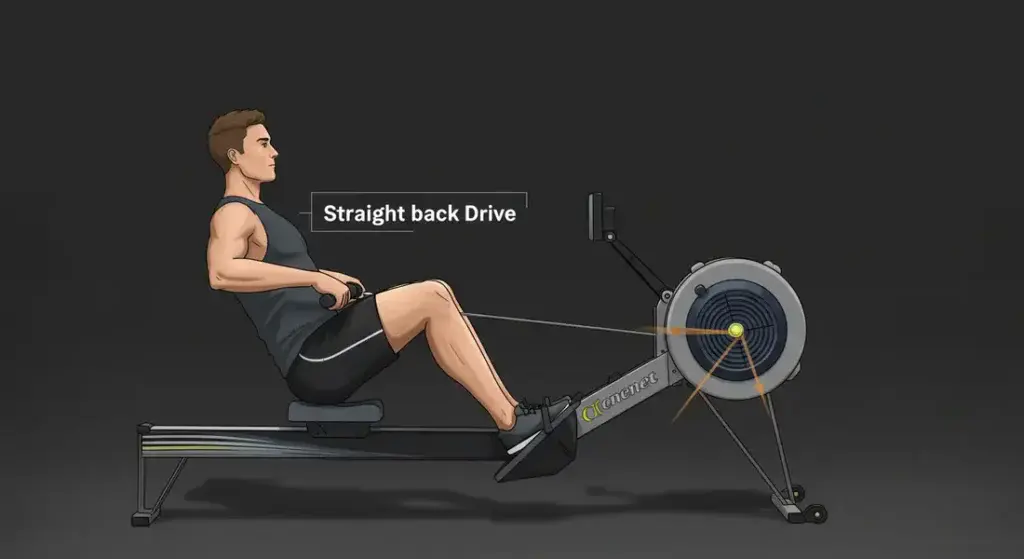
(2) The Drive (Power Phase)
- Legs PUSH FIRST: This is where ~60% of your power comes from.
- Core Swings Back: As legs extend, swing torso back from hips (to “11 o’clock”).
- Arms Pull: Finally, pull handle smoothly to lower chest/upper abs.
(3) The Finish (End of Stroke)
- Legs extended (soft knees), torso leaned back slightly, handle at lower chest.
- Shoulders relaxed, wrists flat.
(4) The Recovery (Return to Catch)
- Arms Extend FIRST.
- Core Hinges Forward: From hips, maintaining straight back.
- Legs Bend: Once handle passes knees, smoothly slide forward.
- Control the recovery; it should take about twice as long as the drive.
Breathing: Exhale during the Drive (effort), inhale during the Recovery.
This might feel like a lot, but practicing drills like “legs only” then “legs and body” can really help.
For an authoritative guide on technique, resources like British Rowing’s technique section are invaluable.
And of course, our own deep dive: Mastering Basic Rowing Technique.
Your First Rows – Simple & Effective Beginner Workouts
Ready to get moving?
Always start with a 5-10 minute warm-up (light cardio, technique drills on the rower).
Workout 1: Steady State Endurance (15-20 mins)
- Goal: Build comfort and cardiovascular base.
- How: Row at a consistent, conversational pace (SPM 18-22).
- Progression: Add 2-3 minutes each week.
Workout 2: Basic Intervals (15-20 mins)
- Goal: Introduce intensity changes.
- How:
- 2 mins moderate rowing (SPM 20-24)
- 2 mins light recovery rowing (SPM 18-20)
- Repeat cycle 3-5 times.
- Progression: Increase moderate segments or add more cycles.
Always finish with a 5-10 minute cool-down (light rowing, stretching hamstrings, quads, back, chest).
Find more routines in our Simple Rowing Workouts for Beginners.
Sidestepping Setbacks – Common Rowing Mistakes (and How to Fix Them!)
We all make ’em! Here are a few common beginner blunders:
- Using Arms Too Early: Remember, legs are king!
- Fix: Keep arms straight until legs are nearly extended and core is engaged.
- Hunched Back (The “Question Mark”):
- Fix: Engage core, sit tall, hinge from hips, “proud chest.”
- Bending Knees Too Early on Recovery: The dreaded handle-knee collision!
- Fix: Arms extend fully, then body hinges forward before knees bend.
- Shooting the Slide: Butt moves back, shoulders get left behind.
- Fix: Coordinate leg push with body swing; imagine your torso and legs moving as one unit initially.
For a full list and solutions, see Common Rowing Mistakes Beginners Make.
Your Rowing Journey – What to Expect & Final Tips
- Be Patient & Consistent: Results take time. Aim for 2-3 sessions a week.
- Listen to Your Body: Muscle soreness is normal initially; sharp pain is not. Don’t push through pain.
- Damper Setting Myth: Higher isn’t always better! For air rowers, a damper setting of 3-5 (on a Concept2, for example) is often recommended. It’s about technique and effort, not just heavy load. British Rowing also advises focusing on technique over high damper settings.
- Hydrate! Water is your friend.
- My Personal Experience: When I started, I focused obsessively on my 500m split time. It led to frustration. Once I shifted focus to consistent technique and enjoying the process, my times naturally improved, and I actually started looking forward to my rows!
Ready to Glide into Fitness? Your Next Steps!
Phew! That was a lot, but hopefully, this Beginners Guide to Rowing Machines has armed you with the knowledge and confidence to embark on your rowing adventure.
From understanding the incredible benefits and navigating the different types of rowers to mastering the stroke and avoiding common pitfalls, you’re now well-equipped.
Rowing at home offers an unparalleled combination of cardiovascular challenge, full-body strength building, and low-impact comfort.
It’s an investment in your health that can pay dividends for years to come.
Now, I’d love to hear from you!
- What are you most excited about when it comes to rowing?
- Do you have any questions that weren’t covered?
- Are you considering a specific type of rower?
Drop your thoughts and questions if there are any! We’re all on this fitness journey together.
And if you’re ready to take the next step:
- Check out our in-depth Rowing Machine Reviews.
- Explore other Beginner Fitness Guides to build a well-rounded routine.
- Don’t forget to share this guide with any friends who might be curious about rowing!
Happy Rowing!