You understand what a home gym is and you know the different types.
Now for the exciting part: actually using it to build a stronger, healthier body.
Looking at your new machine can feel a little daunting, but here’s the secret: you only need to learn a handful of core movements to get a fantastic, full-body workout.
In this guide, we’ll walk you through seven foundational exercises that target all your major muscle groups.
We’ll explain how to do them, what they work, and how to put them together into a simple routine.
In a Nutshell – Your First Workout Plan
- Always Warm-Up: Start with 5 minutes of light movement to prepare your body.
- Form Over Weight: Your goal is to learn the movements correctly. Start light!
- The 7 Key Moves: You’ll learn to work your Chest, Back, Legs, and Arms.
- The Plan: Perform 2-3 sets of 10-12 repetitions for each exercise.
- Always Cool Down: Finish with 5 minutes of gentle stretching.
Before You Begin – The 3 Golden Rules for Beginners
Safety and good habits start from day one.
Before you move a single pound of weight, let’s cover three non-negotiable rules.
- Understand “Sets” and “Reps”: A “Rep” is one complete motion of an exercise. A “Set” is a group of reps. 3 sets of 10 reps means you do 10 reps, rest, do another 10, rest, and do a final 10.
- How Much Weight to Start With: Pick a weight you can lift for 10-12 reps where the last few are challenging, but your form is still perfect. If you can’t do 8 reps, it’s too heavy. If you can easily do 15+, it’s too light.
- Always Warm-Up: A 5-minute warm-up gets your blood flowing and reduces your risk of injury. Try marching in place, arm circles, and bodyweight squats.
The 7 Essential Home Gym Exercises
Here are the core movements you’ll find on almost any weight stack home gym.
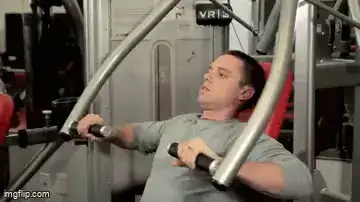
1. The Chest Press
YouTube
- What it works: Your chest (pectorals), shoulders, and triceps.
- How to do it: Sit with your back firmly against the pad and feet flat. Grasp the handles at chest level. Push forward until your arms are straight (but not locked). Pause, squeeze your chest, and slowly return.
2. The Lat Pulldown

YouTube
- What it works: The large muscles of your back (lats) and your biceps.
- How to do it: Grasp the bar with a wide, overhand grip. Sit down, securing your knees under the pads. Keeping your chest up, pull the bar down to your upper chest. Squeeze your shoulder blades, then slowly return.
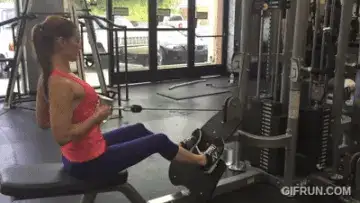
3. The Seated Row
YouTube
- What it works: The muscles of your mid-back and your biceps.
- How to do it: Sit with your feet on the footplates, back straight. Pull the handle towards your stomach, squeezing your back muscles. Slowly extend your arms back to the start.
4. The Leg Extension

YouTube
- What it works: The muscles on the front of your thighs (quadriceps).
- How to do it: Sit and place your shins behind the roller pads. Hold the support handles. Smoothly extend your legs upwards until straight. Squeeze your quads, then slowly lower.
5. The Standing Leg Curl
YouTube
- What it works: The muscles on the back of your thighs (hamstrings).
- How to do it: Stand and place the back of one ankle against the roller pad. Hold the machine for support. Curl your heel up towards your glutes. Squeeze, then slowly lower. Finish all reps on one leg before switching.
6. The Bicep Curl
YouTube
- What it works: The muscles on the front of your upper arms (biceps).
- How to do it: Stand holding the low pulley bar with an underhand grip. Keep your elbows tucked into your sides and curl the bar up towards your chest. Squeeze your biceps, then slowly lower.
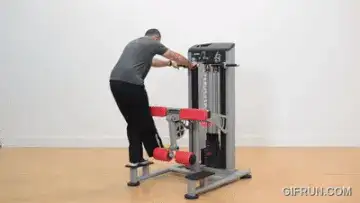
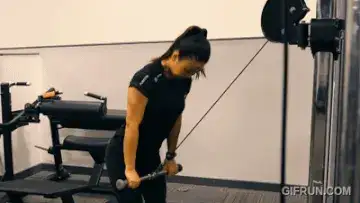
7. The Triceps Pushdown
YouTube
- What it works: The muscles on the back of your upper arms (triceps).
- How to do it: Grasp the high pulley bar with an overhand grip. Pin your elbows to your sides. Push the bar down until your arms are fully extended. Squeeze your triceps, then slowly return to the start.
Trainer’s Note – Control is Everything – Use the 2-1-2 Tempo
Avoid rushing your reps. The best way to build muscle and prevent injury is to control the weight. Try this tempo on every single rep:
- Take two seconds to push or pull the weight (the exertion part).
- Pause for one second at the top of the movement and squeeze the muscle.
- Take two seconds to slowly return the weight to the starting position.
Putting It All Together – Your Sample Beginner Workout
Perform this workout 2-3 times per week on non-consecutive days (e.g., Monday, Wednesday, Friday).
Write this down in a notebook to track your progress!
- Warm-up: 5 minutes
- Chest Press: 3 sets of 10-12 reps
- Lat Pulldown: 3 sets of 10-12 reps
- Leg Extension: 3 sets of 10-12 reps
- Standing Leg Curl: 3 sets of 10-12 reps (per leg)
- Bicep Curl: 2 sets of 12-15 reps
- Triceps Pushdown: 2 sets of 12-15 reps
- Rest: 60-90 seconds between each set.
Finish Strong – Your 5-Minute Cooldown
Don’t just finish your last rep and walk away.
A brief cooldown helps improve flexibility and reduce soreness.
Gently stretch the muscles you just worked, holding each stretch for 20-30 seconds (don’t bounce!).
Focus on your chest, back, quadriceps, and hamstrings.
Frequently Asked Questions
- How do I know when it’s time to increase the weight?
Use the “2 for 2 Rule.” If you can successfully complete 2 more reps than your target (e.g., 12 reps instead of 10) for 2 consecutive workouts with good form, it’s time to increase the weight by the smallest increment. - What if an exercise hurts?
Stop immediately. Muscle “burn” is normal; sharp joint pain is not. Check your form, try a lighter weight, and if the pain persists, avoid that exercise. - Should I be sore after every workout?
No. Some muscle soreness is normal when you’re new or trying a new exercise, but you shouldn’t be debilitatingly sore after every session. As your body adapts, the soreness will decrease.
You’re Ready to Go!
You now have the knowledge and the plan to use your home gym safely and effectively.
But before you rush out to buy one, there are two very important practical considerations: space and money.
Let’s tackle those next.
Read Next: Assessing Space and Budget for a Home Gym